Making: Turner’s Cube
Almost everybody knows what it is like when things get busy and an interest or hobby gets put on the back burner indefinitely. It has been a couple years since I posted about my last serious project. This month marks a year since we packed up everything, sold the house, and moved to Pittsburgh. Since then we bought a house not far from where we were renting and moved again. A few months after that we got married. So it’s not surprising I haven’t been able to work on projects, let alone post about them. That all changes this year though, and I already have a few projects underway that I’ll be writing about here at Coffee With Robots.
One of the first things I did after moving to Pittsburgh was join the local hackerspace, HackPittsburgh. Though with everything going on at the time I wasn’t able to participate as much as I would have liked until after the holidays. Back in January on a whim I signed up for a “Machining 101” class that was offered to the members. I grew up around woodworking but have always wanted to learn to work with metal and thought this was the perfect opportunity to get back into the swing of things.
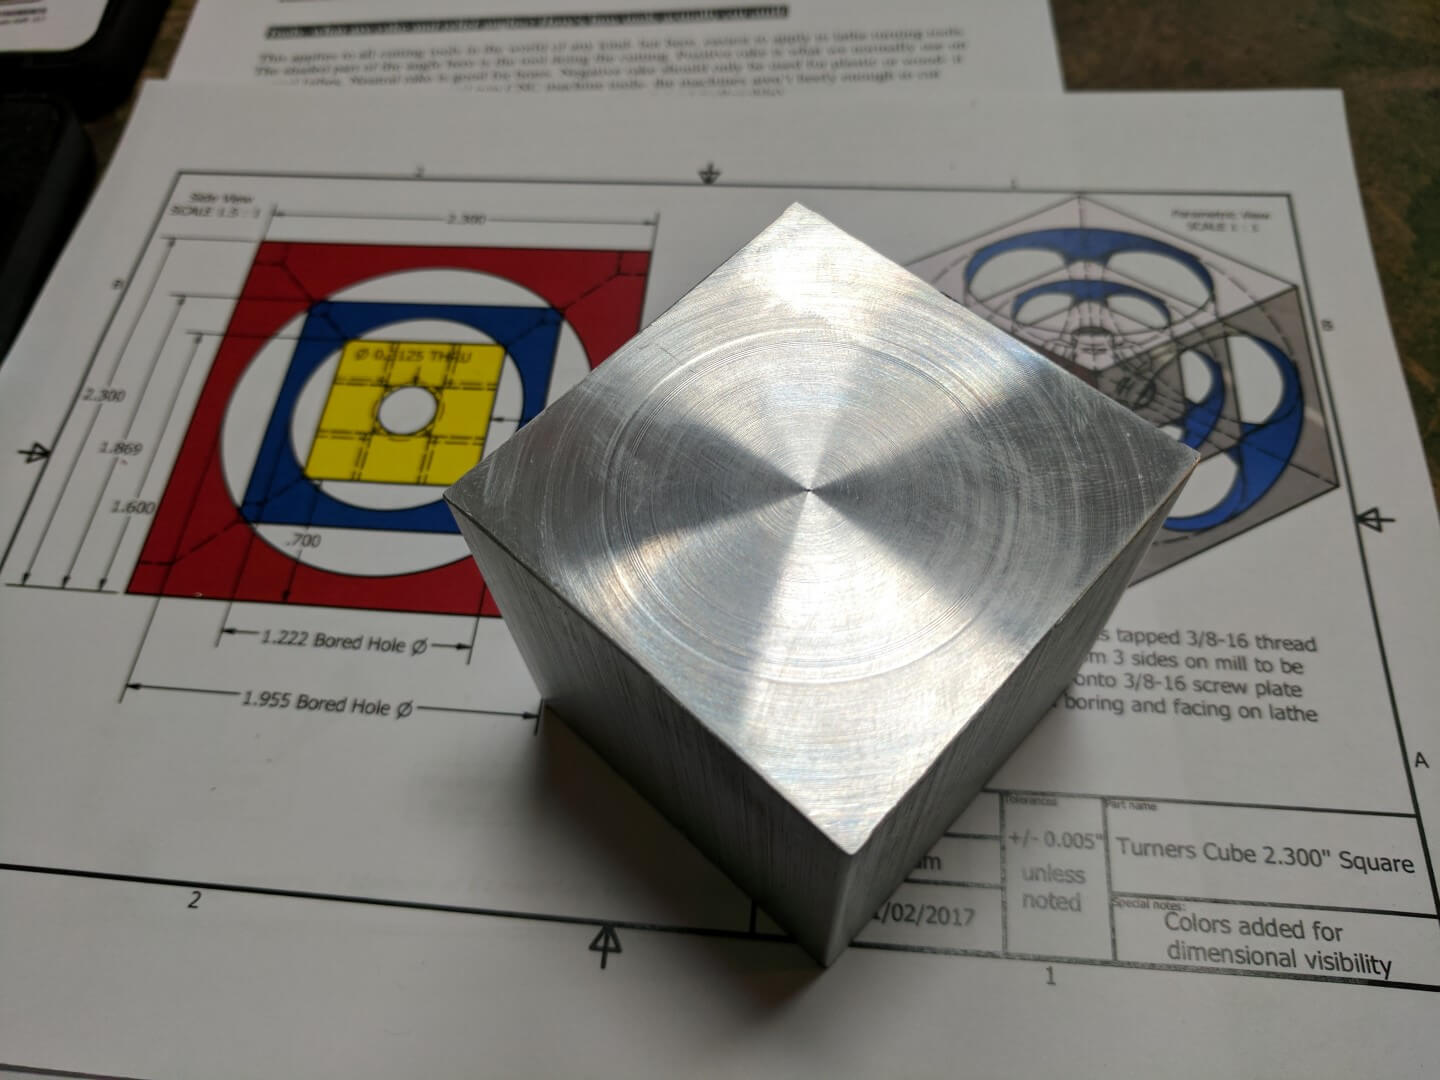
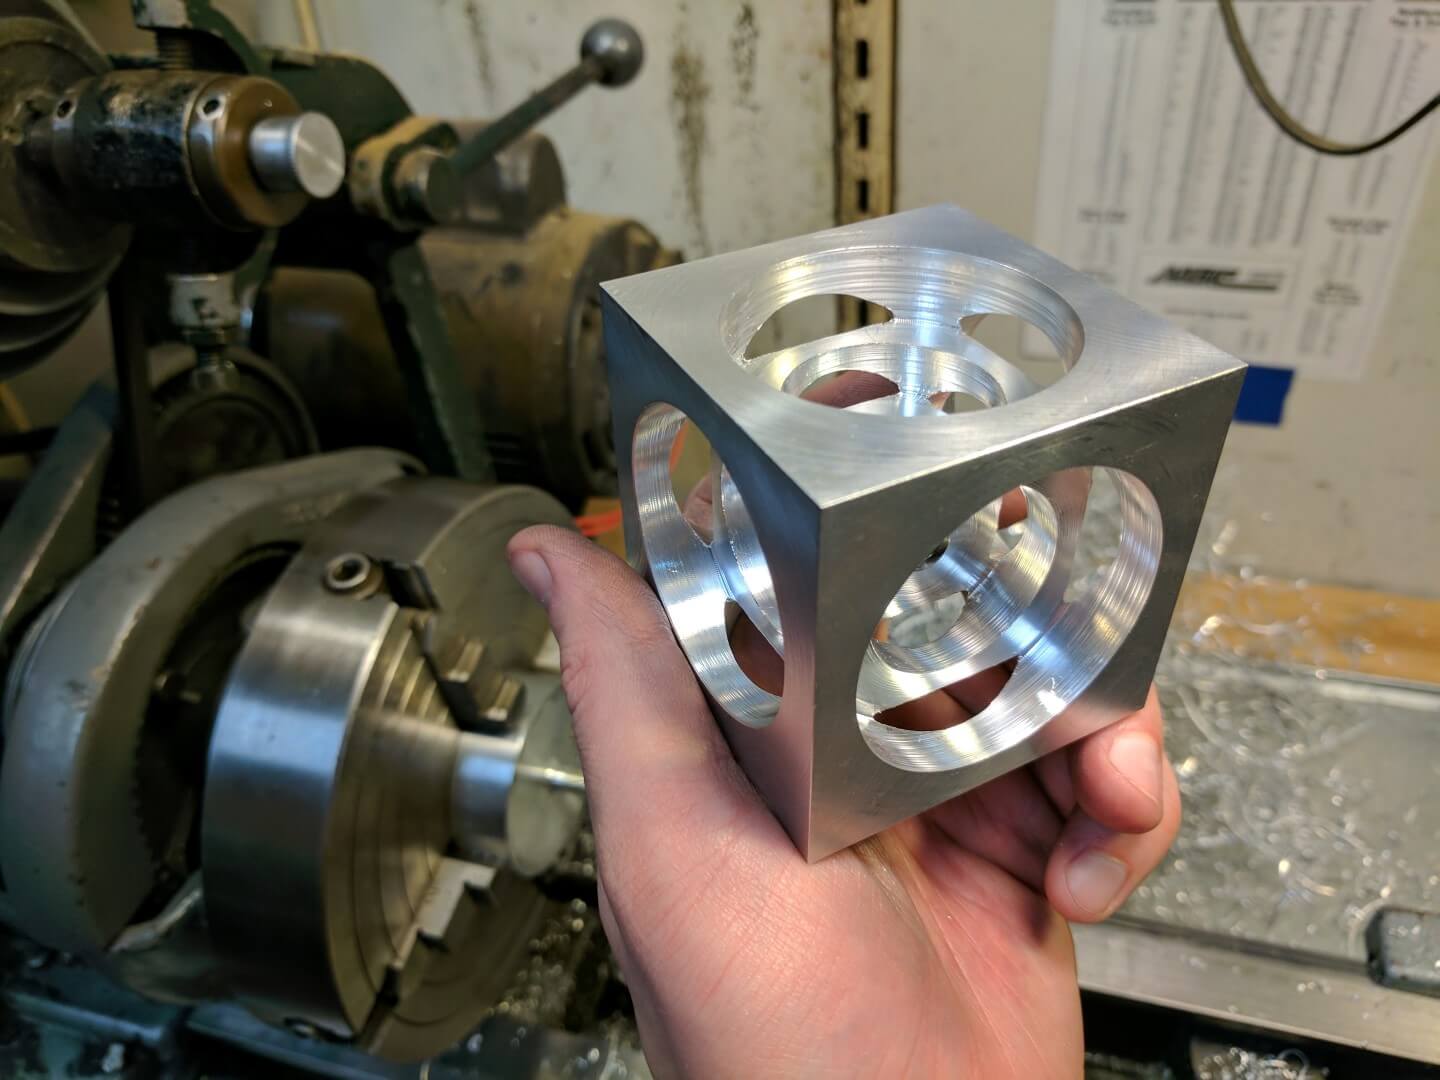
The goal of the class was simple: to make a Turner’s Cube.
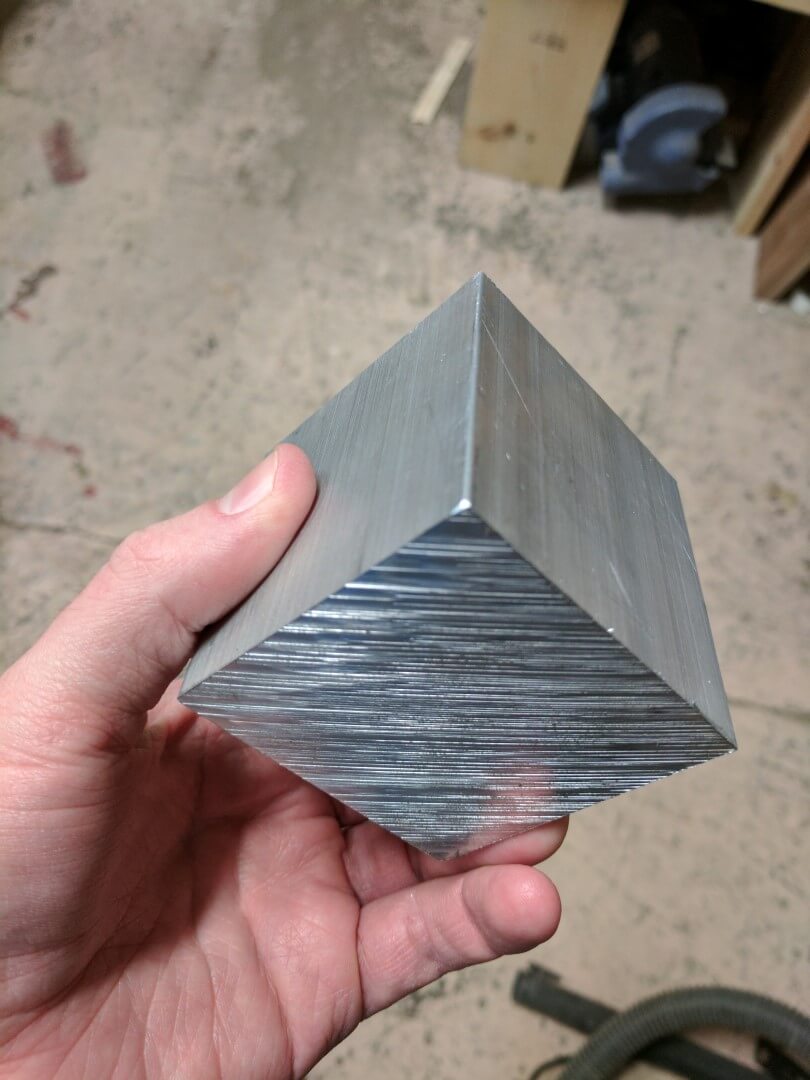
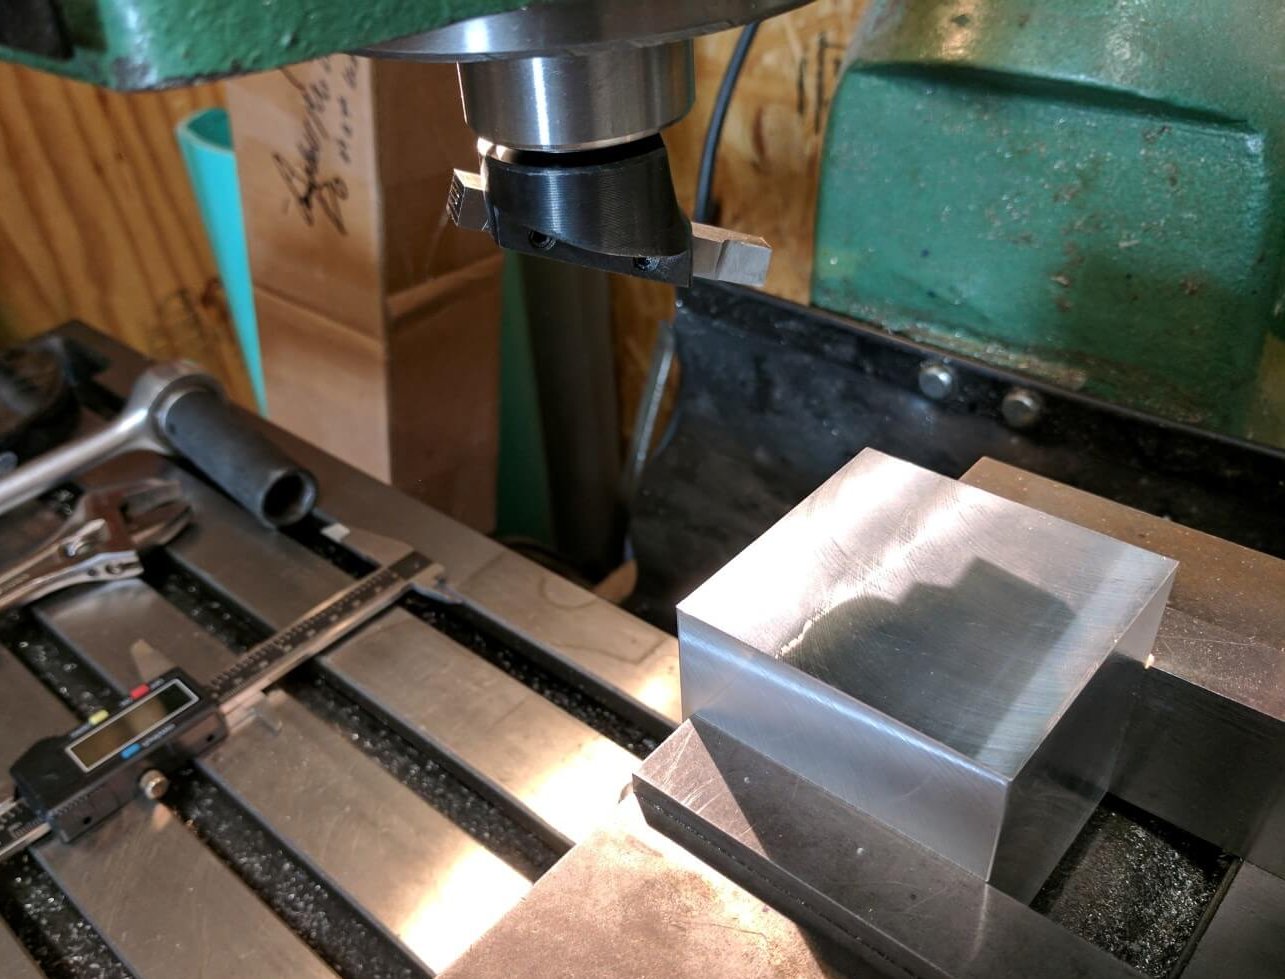
Each of us got a cube of aluminum cut from an extruded square bar
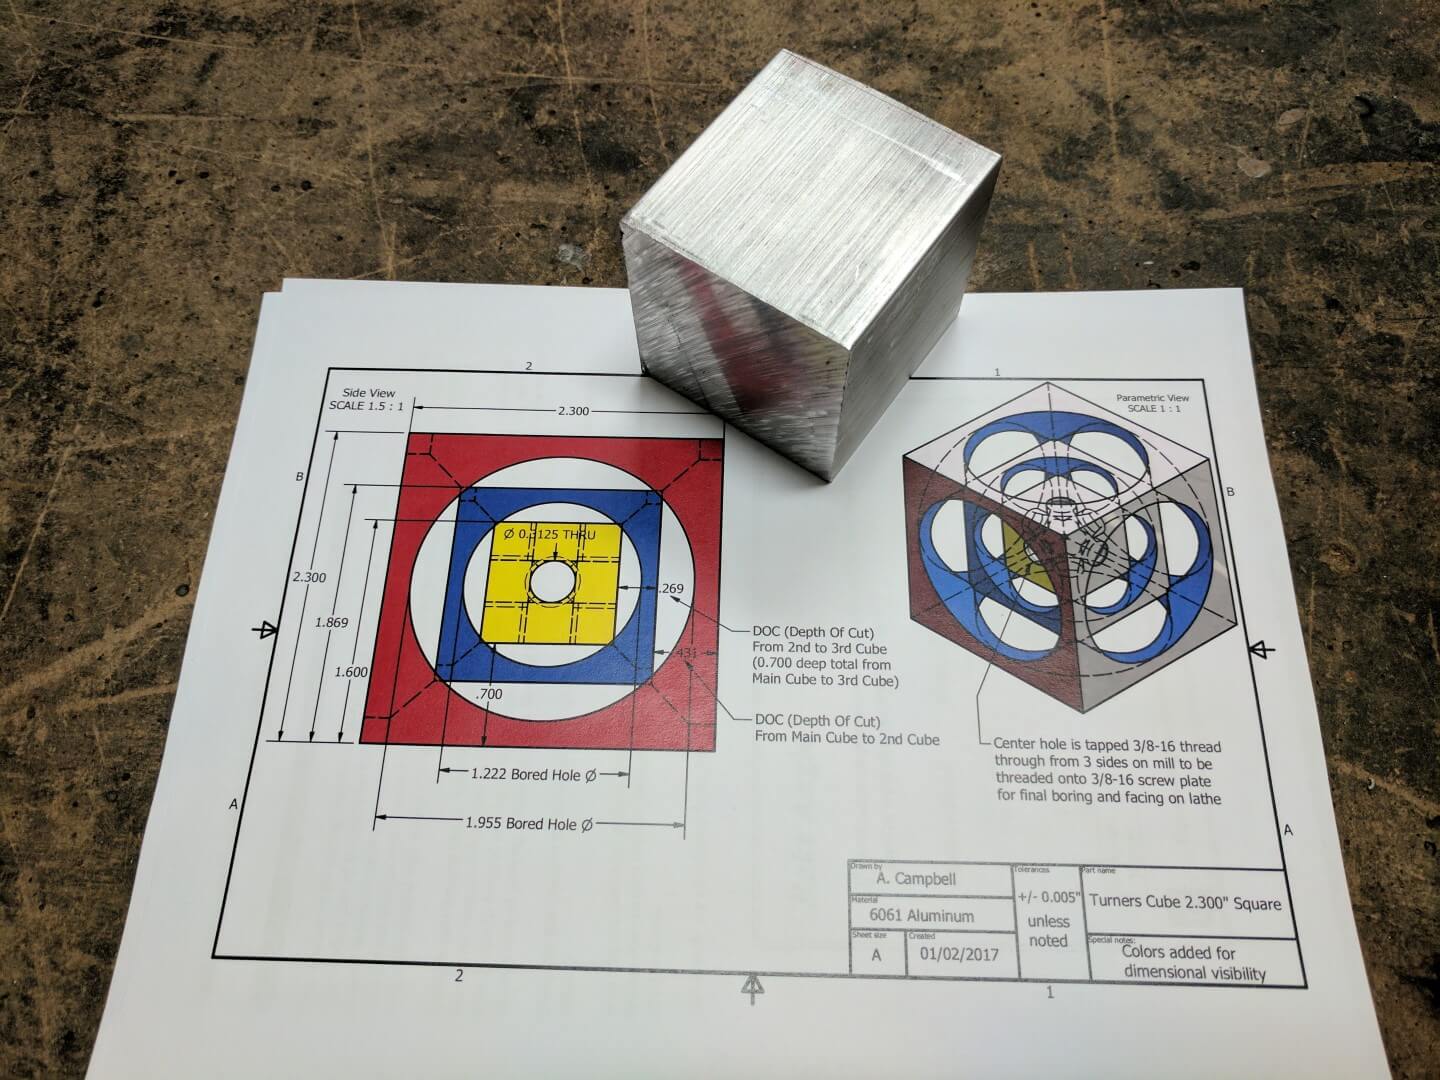
We started with a rough aluminum cube and a drawing
A Turner’s Cube is a classic machinist exercise that traditionally is done entirely on a lathe. Hence the name. However there’s no reason that you can use a mill or CNC to make one. To learn skills across different machines we did various steps on both a manual mill and a metalworking lathe.

Manual milling machine with DROs at Hack Pittsburgh

Rebuilt 1930’s metalworking lathe at Hack Pittsburgh
A Tuner’s Cube requires precision, and precision requires making sure the tools you’re working with are properly square or round. To do this we learned how to use a dial test indicator to tram the vice on the mill and make sure the mount on the lathe was properly centered. The tolerance for the cube we were making was specified at +/- 0.005″ (five thousandths of an inch), so if something was even just a little off from the get-go it would give you trouble later on. You want the inner cubes to properly align and look nice, but you also want to make sure the chunk of metal you’re about to mount to a rapidly spinning machine is well balanced and centered.
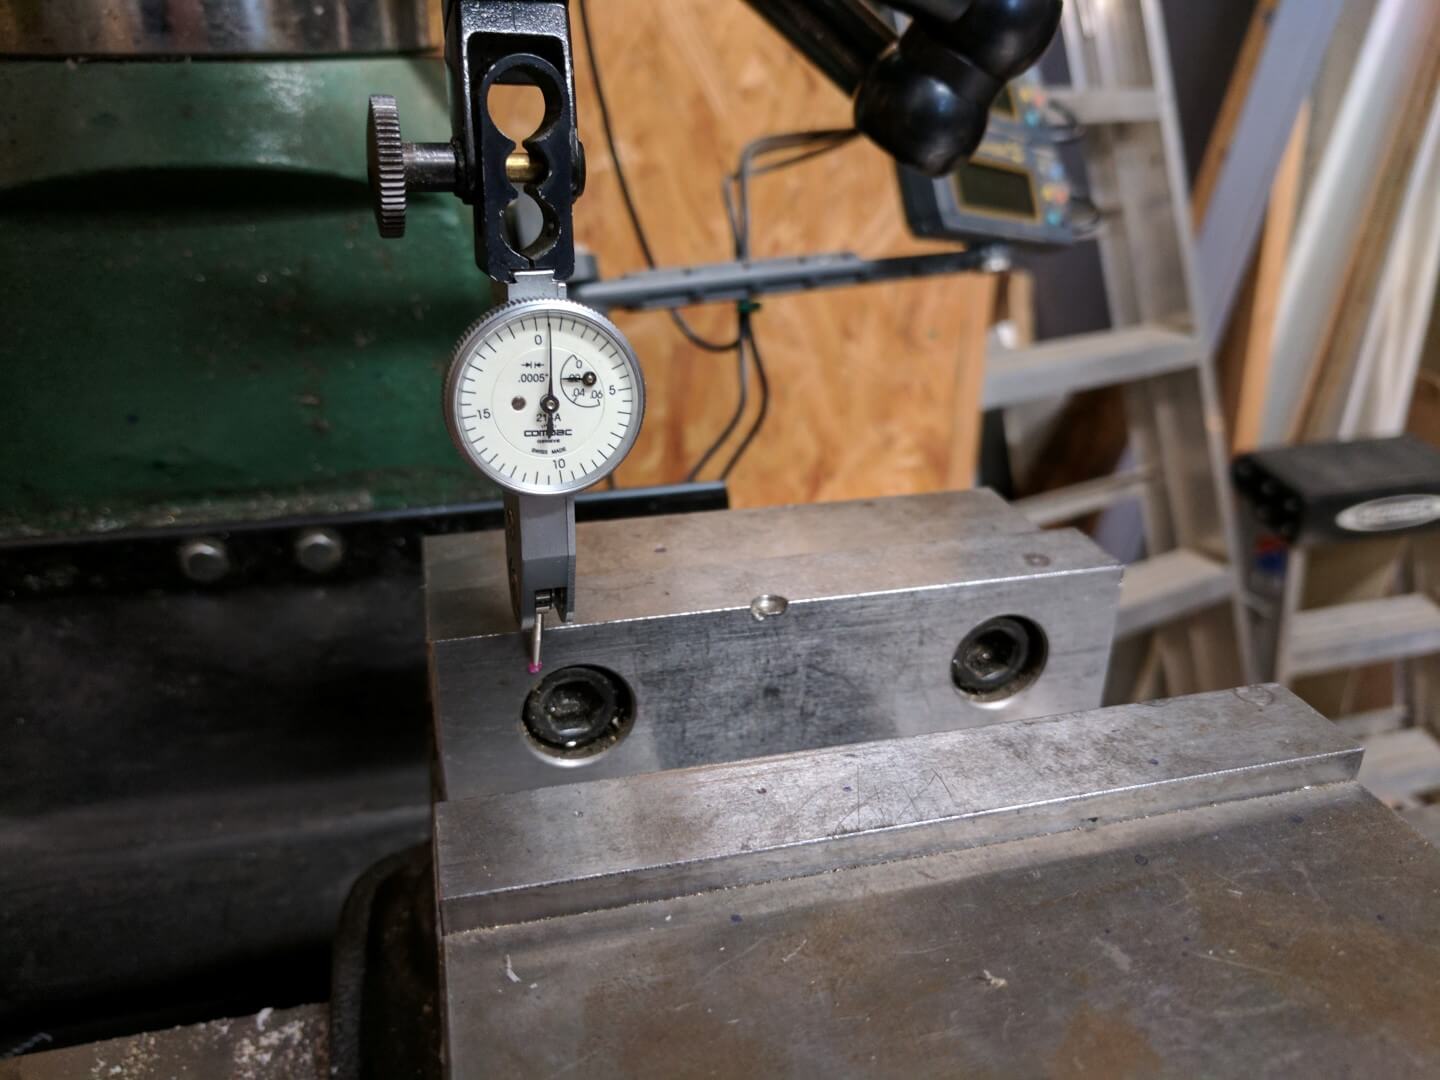
Tramming the vice on the mill with a dial test indicator
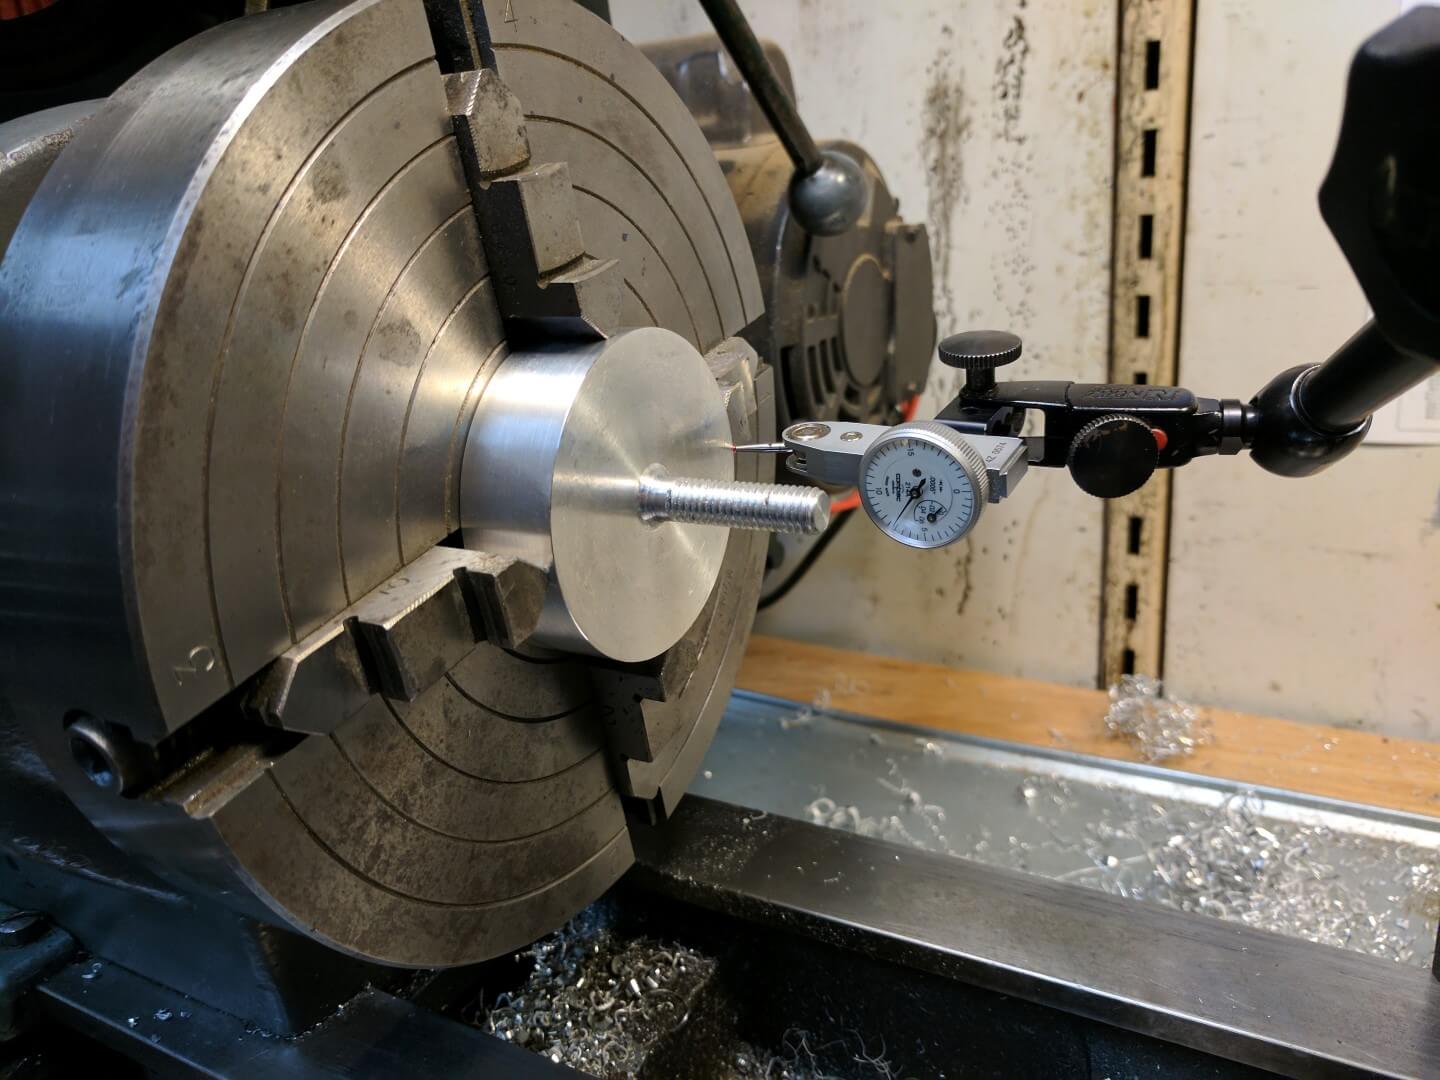
Indicating whether or not the mount on the lathe is round
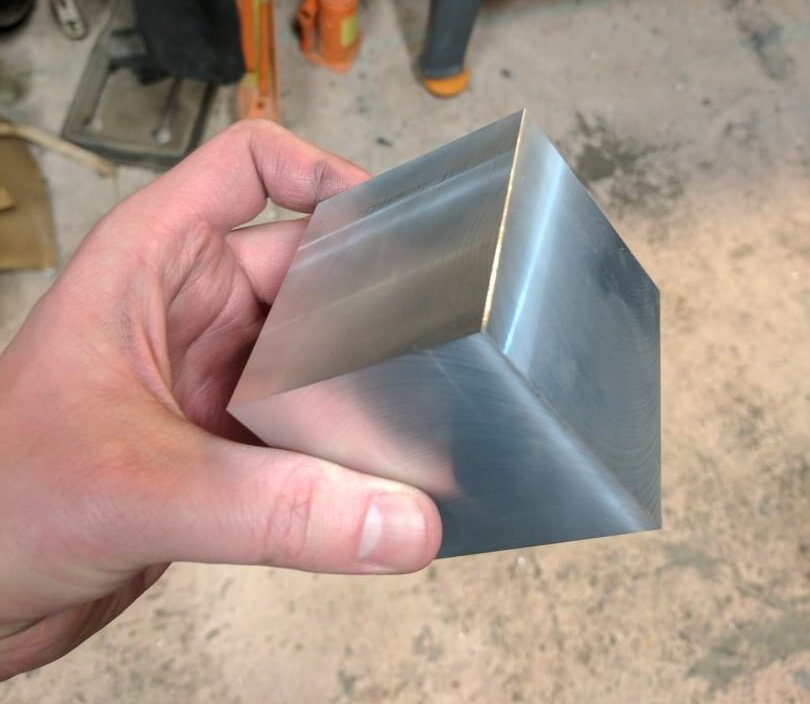
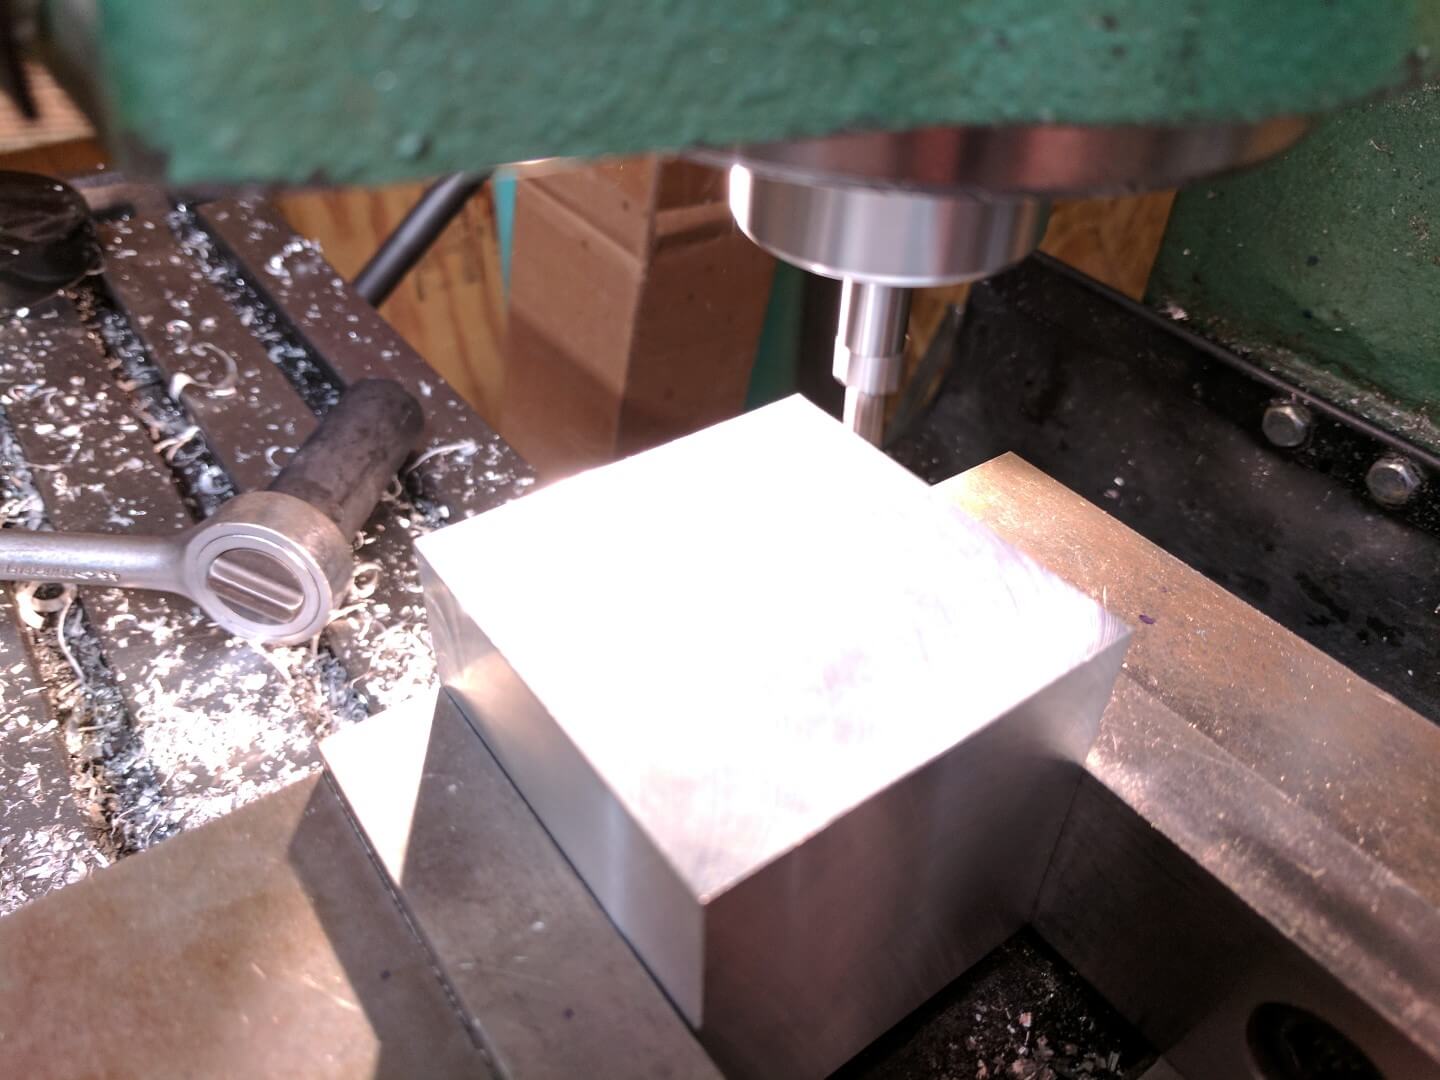
Next we had to bring our cubes down to the proper size and make sure they were square. We brought most of the faces to within ten-thousandths of an inch of their final dimensions on the milling machine with an endmill. Though we also learned how to face on the lathe as well. To make sure everything was nice and consistent we finished up the faces on the mill with a fly-cutter.

Face done with end mill
Faced on the lathe
Going over the faces with a fly cutter
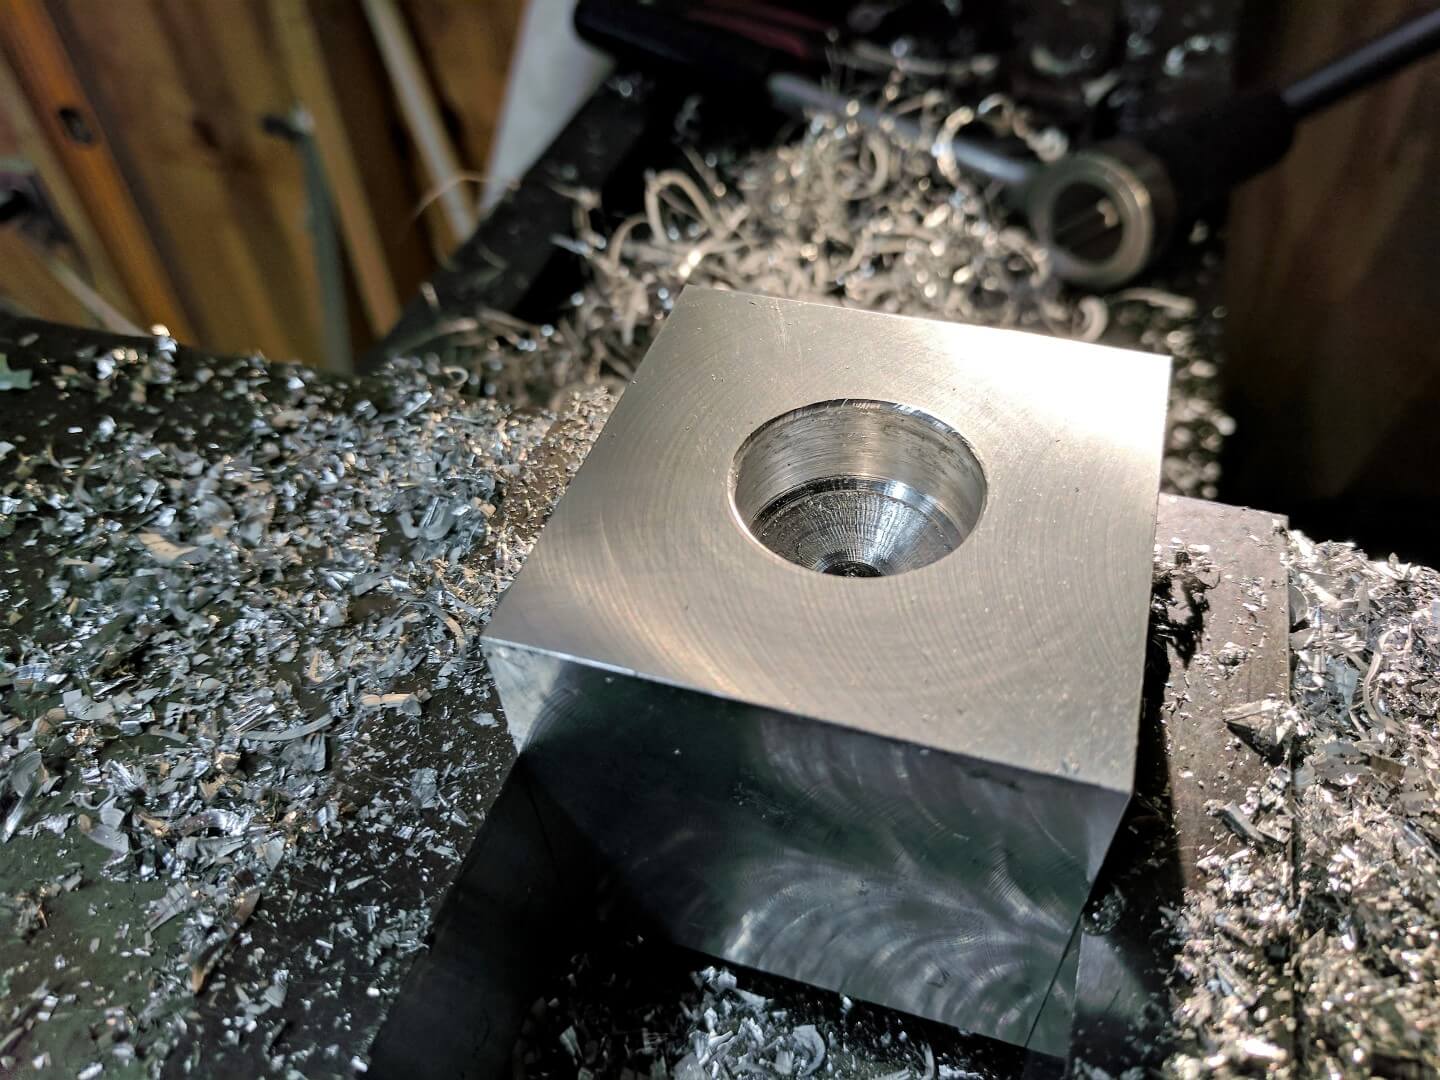
Ready to drill and tap
Once the cube was milled to the proper dimensions we could start drilling the holes for the taps that would allow us to mount it onto the lathe. An edge-finder was used to find the zero point and origin the DROs to make sure the hole is drilled through dead center. After the holes were drilled and tapped the cube could then be mounted onto the lathe and we could start boring out the concentric holes that make up inner cubes.
Using an edge-finder to set the zero point
Drilling the holes for the tap

First axis tapped for the mount
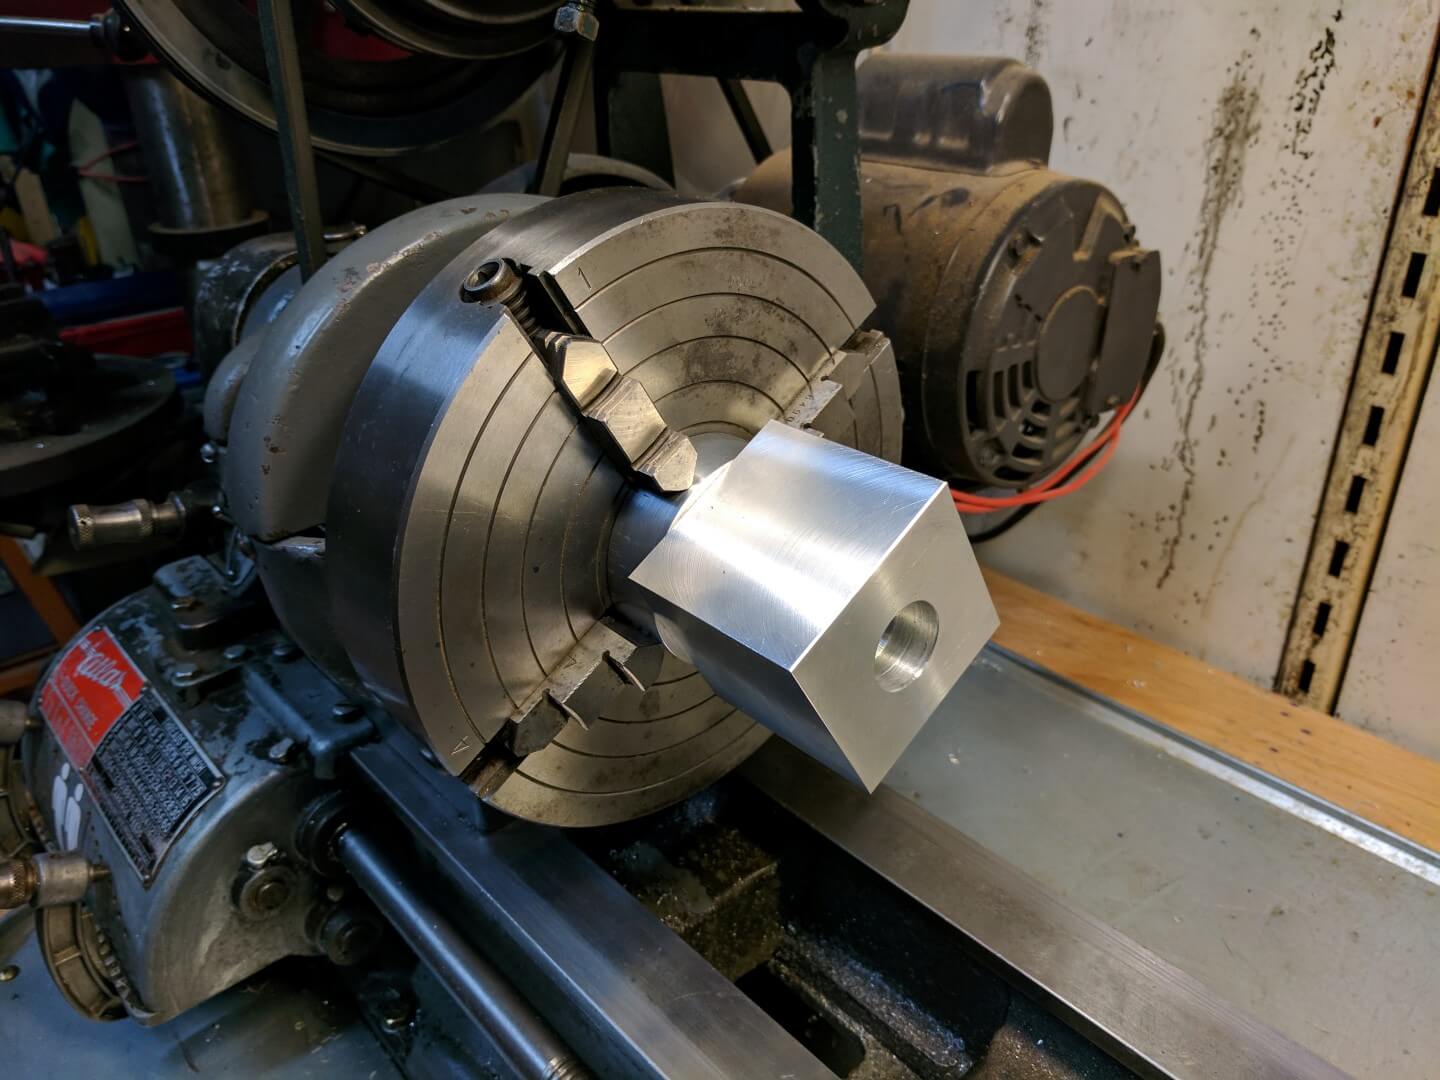
Ready to start boring the first hole
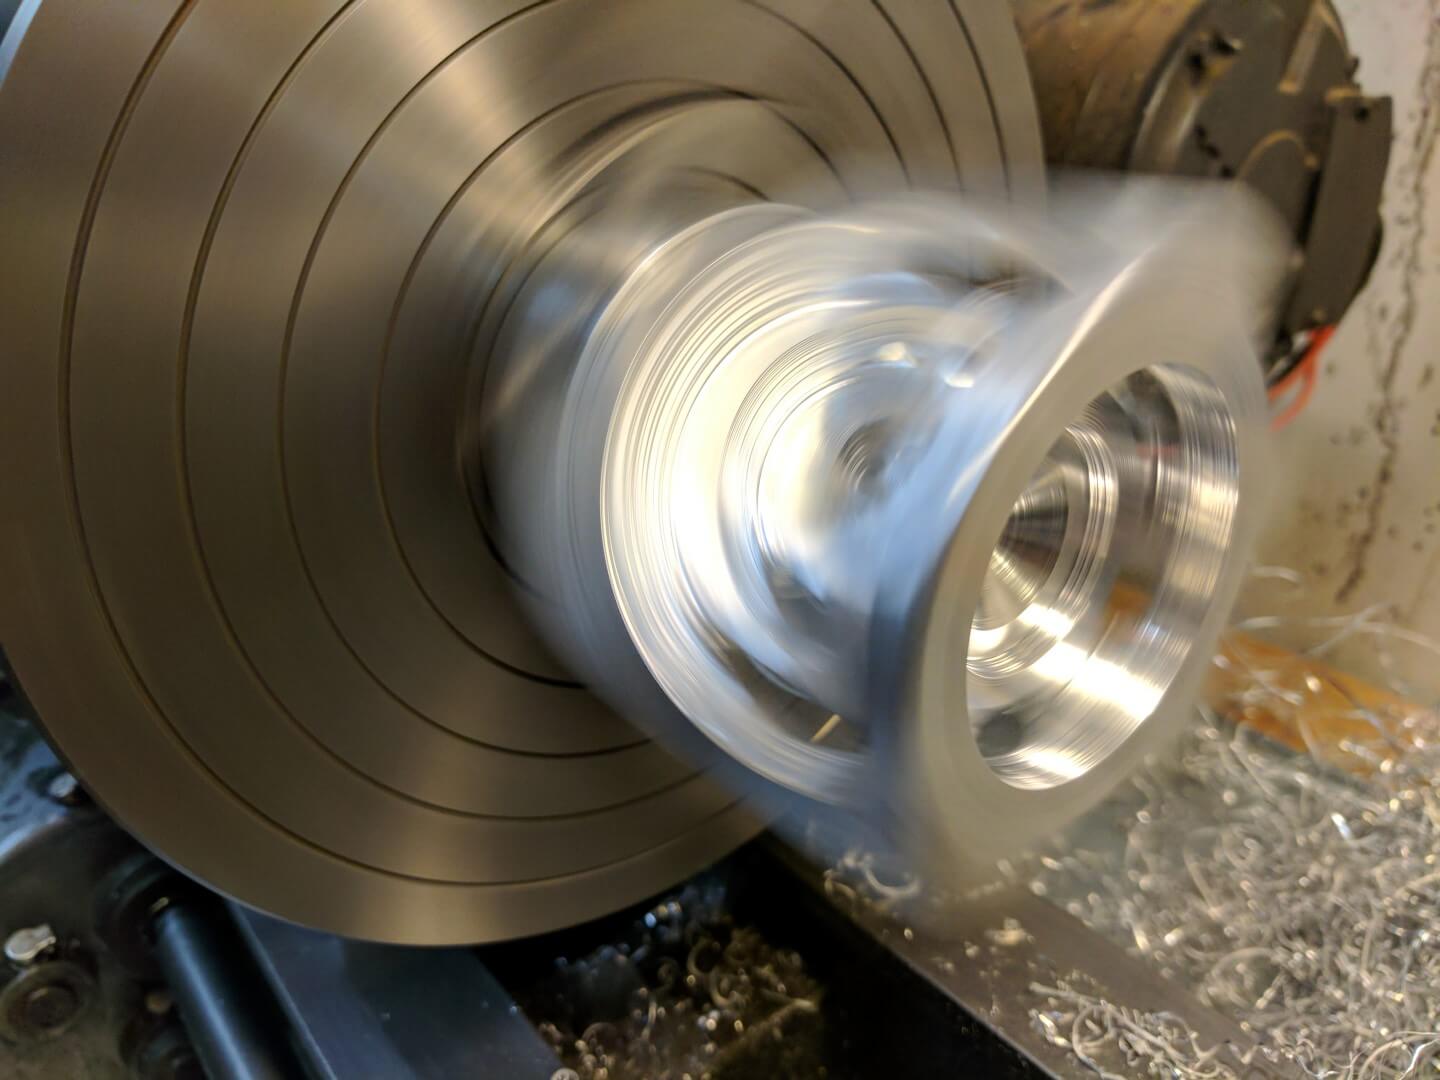
Working on boring out the final axis
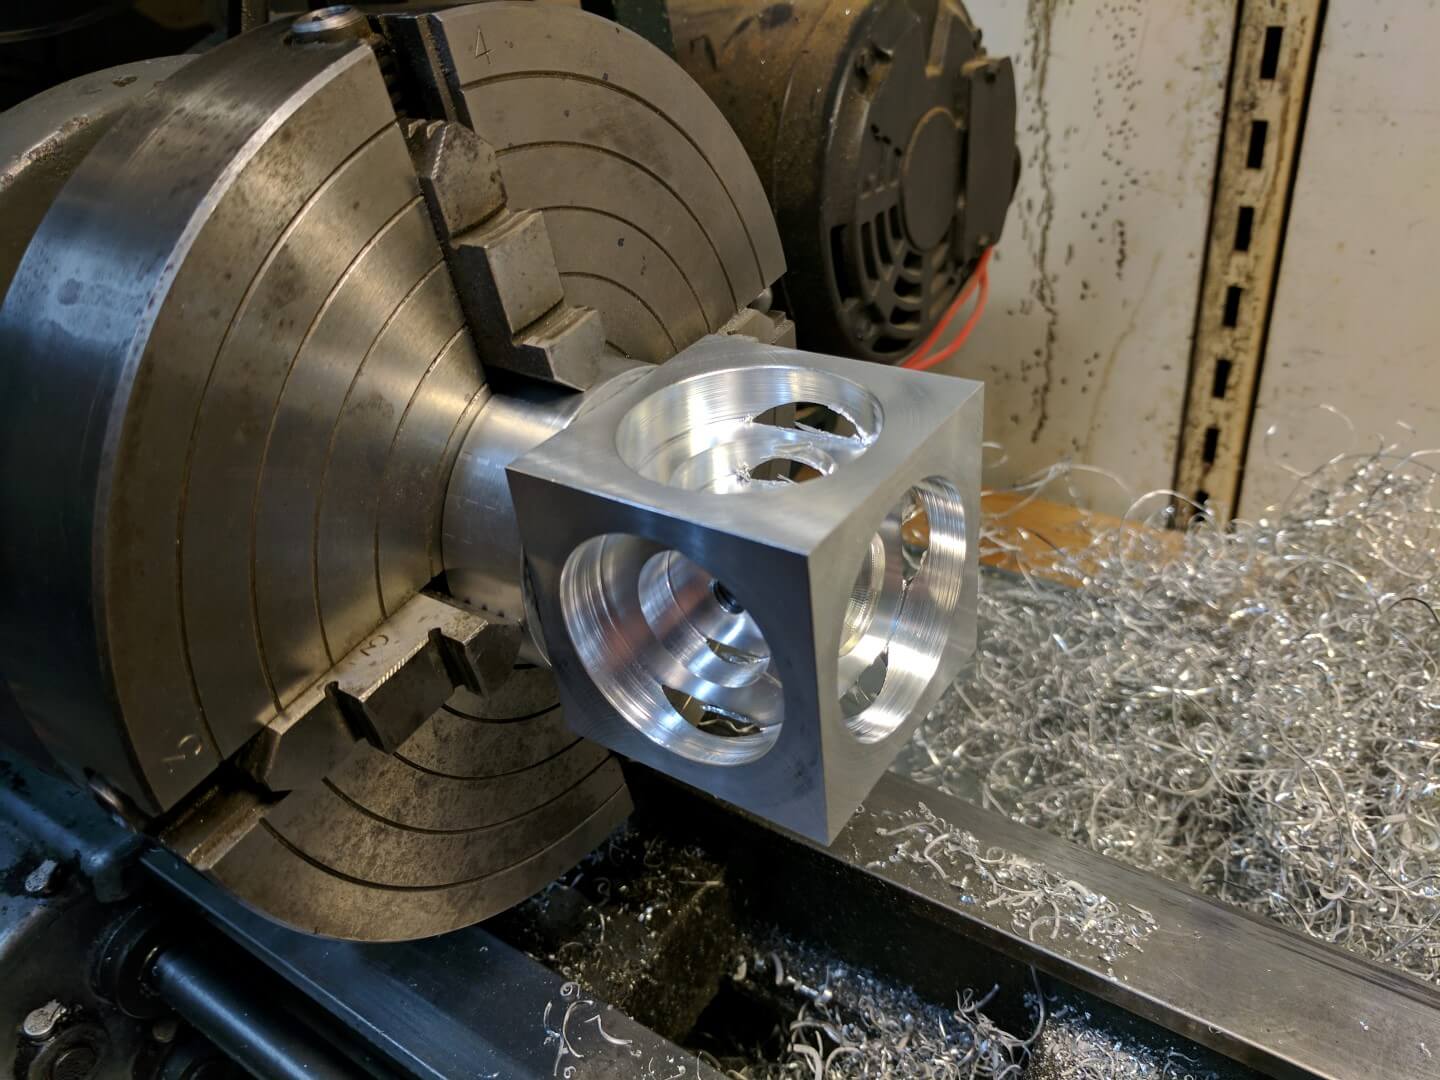
Just need to hit it with a deburring tool
After a few hours of working on the lathe the cube was finally finished. All it needed was a bit of deburring and some way to display it. For that I took advantage of the already tapped inner cube bore to make a simple stand out of a piece of thread rod and scrap aluminum.
Finished. Now to make a stand
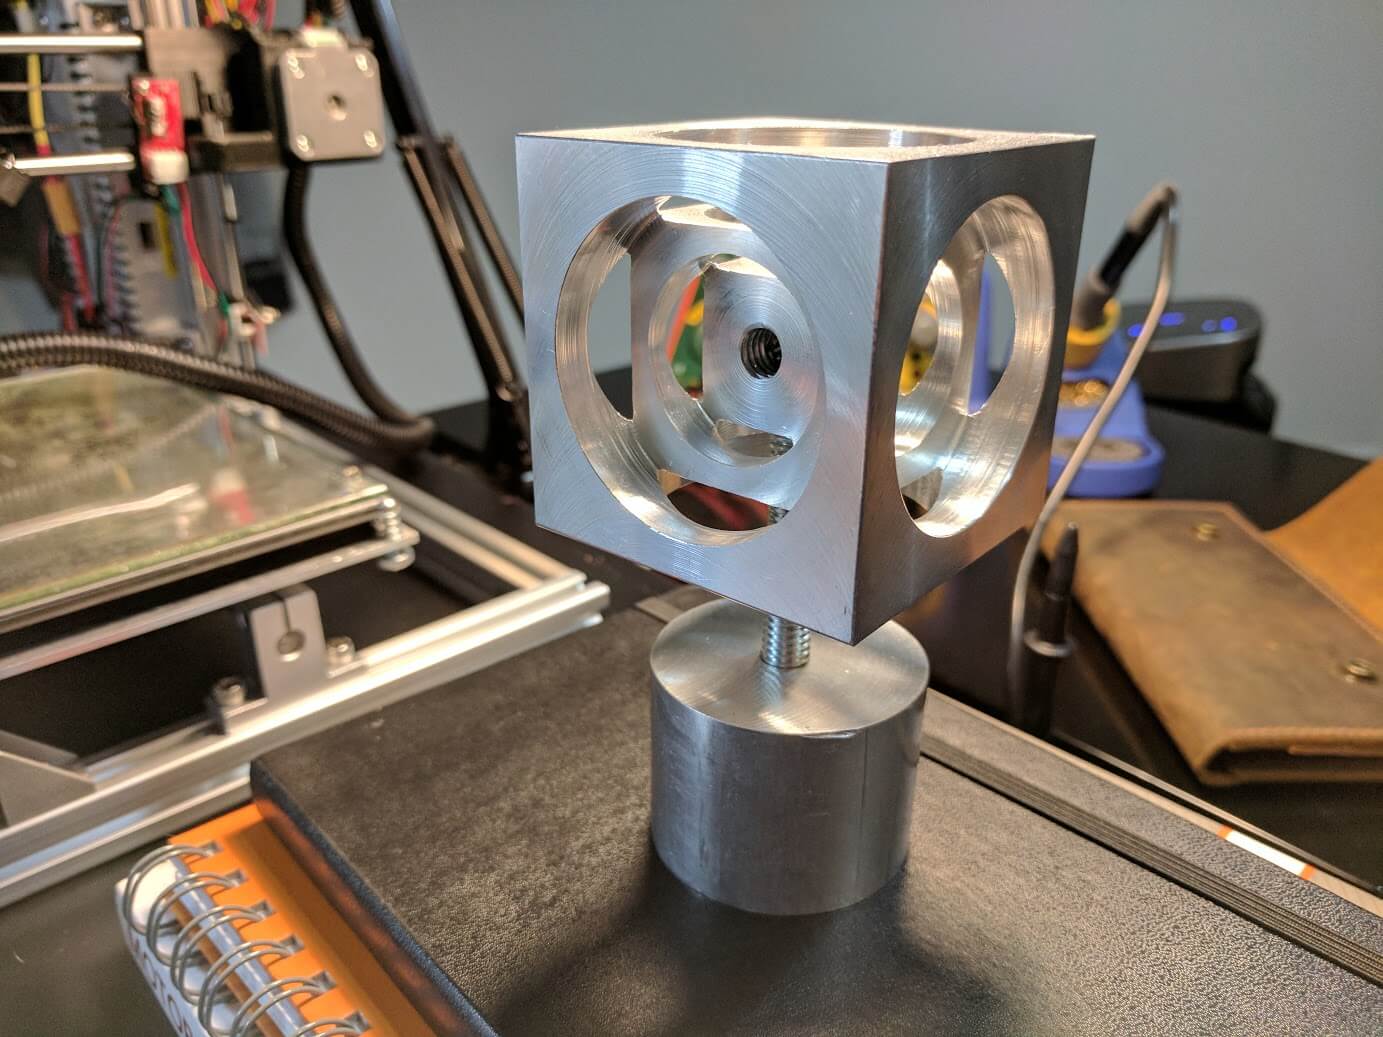
A quick and easy stand for display
Aside from learning new things and having a pretty neat cube on my desk, the biggest takeaway for me was that it got me making again and opened up new avenues for doing so. Often ideas and thoughts about processes get constrained by our available tools and abilities and end up limiting our choices and possibilities. I’ll get into this more when I write about 3D printing, but certain skills are like gateway skills that open doors for making things in entirely new ways. They cause a paradigm shift in the way we look at design and materials. Investing in foundational skills – like machining – is something that will benefit you for the rest of your life.