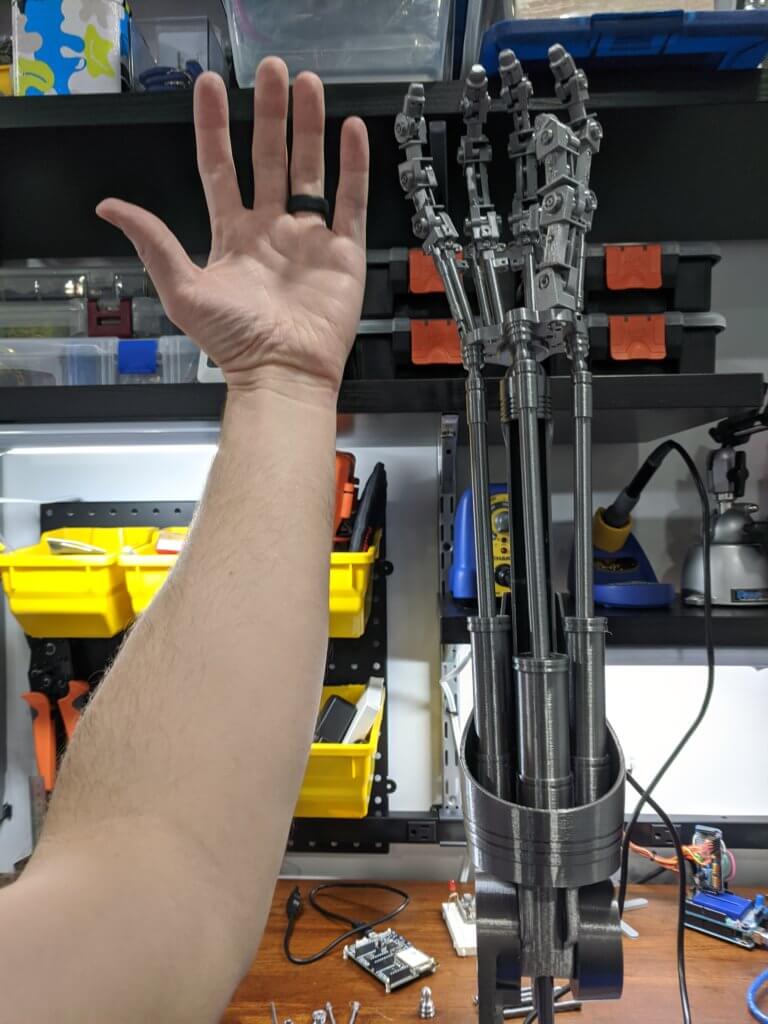
Making: T-800 Terminator Arm
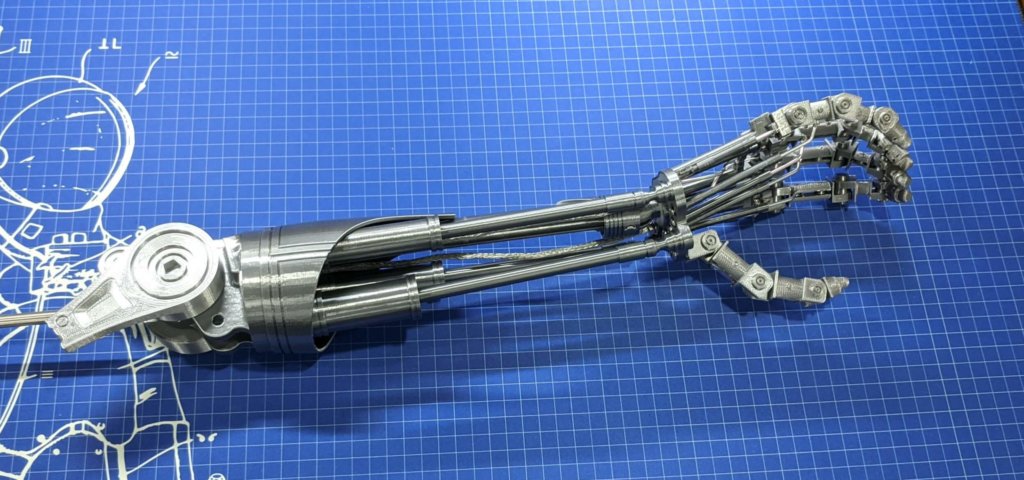
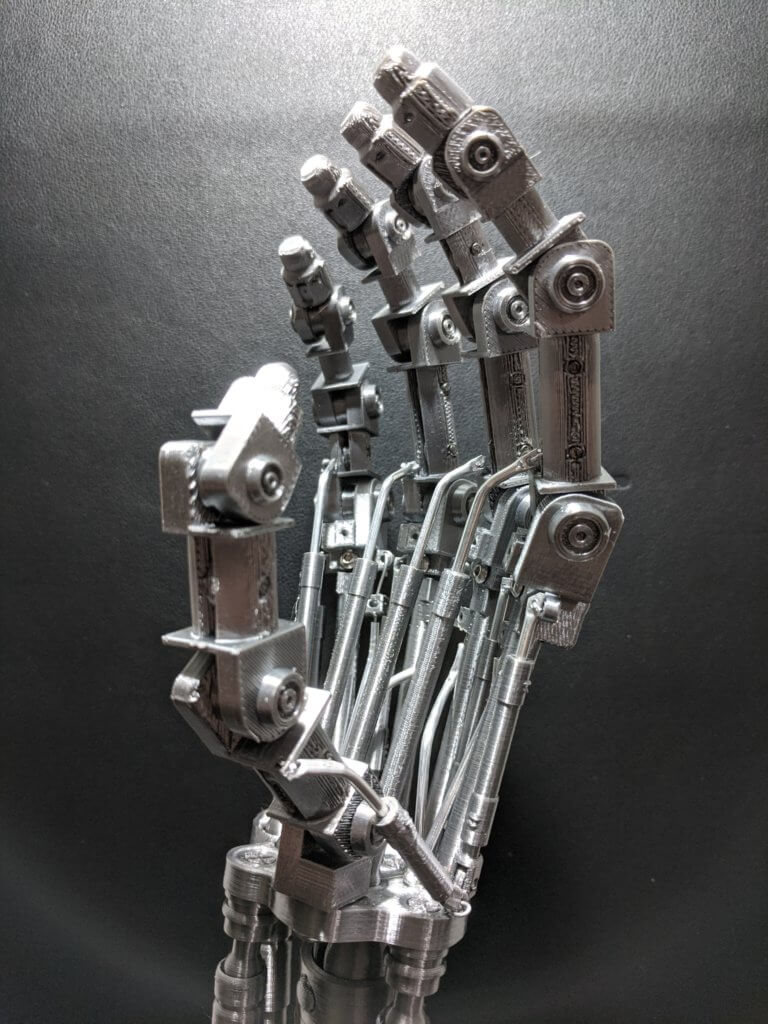
I have never really been big on metallic filaments because it always seemed like they were missing something. They always looked more glittery than metal-like to me. However with recent surge in popularity of silky style filaments it may be time to give them another look. At a recent meetup at a local 3D printing focused makerspace I came across a silky gray metallic PLA by Hello3D. They also had a silver version, but something about the grey metallic stood out to me. It had more of a titanium or steel look that looked more like metal than the typical plain silver. I knew right away that I had to get a spool and try to print something robotic looking. I came across this model on Thingiverse and figured I’d give it a shot over the Thanksgiving holiday.
This would really be my first 3D printed model that involved more than a few different parts. Not sure why it took me so long since as a kid I always loved putting together and finishing model cars and planes. Had I had a 3D printer growing up that probably would have been one of the first things I tried. I think part of it is just the time investment as each set of parts has to be planned and sliced and possibly reprinted multiple times until you get it right. On the flip side though, having models print in many pieces does open up new opportunities to build complex objects with features that may have been difficult or impossible to print as a more monolithic part.
I started off by opening some of the STL files in Simplify3D and getting a feel for what features might prove difficult. Figuring out where and when to use supports is just one of those things you learn with experience. This particular filament uses a slightly higher hot-end temperature (~210 °) than I would usually use with PLA and so I found I had to slightly increase the support separation distance and density else they were really difficult to remove. Thankfully this particular model didn’t require too many supports with most being in the finger segments. The filament also seemed to contract more than usual as it cooled and so it bridged beautifully. The caveat being that you need to use a decent skirt to prime the nozzle since it cools and contracts and thus takes a bit to get started.
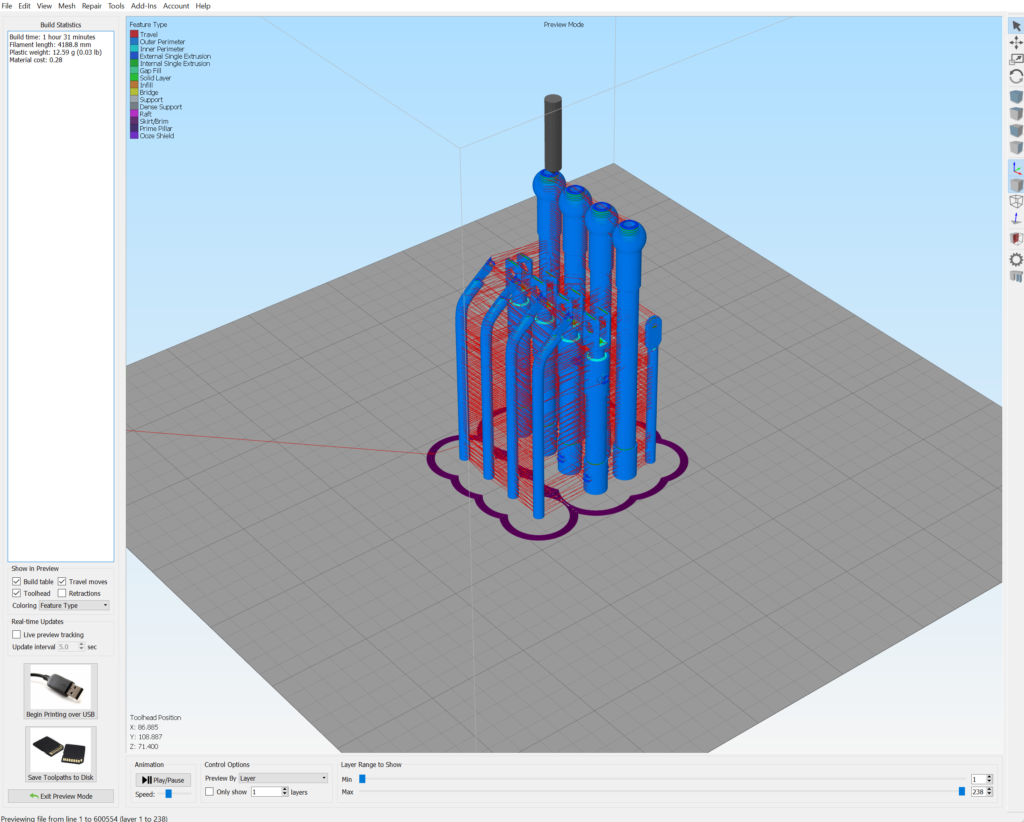
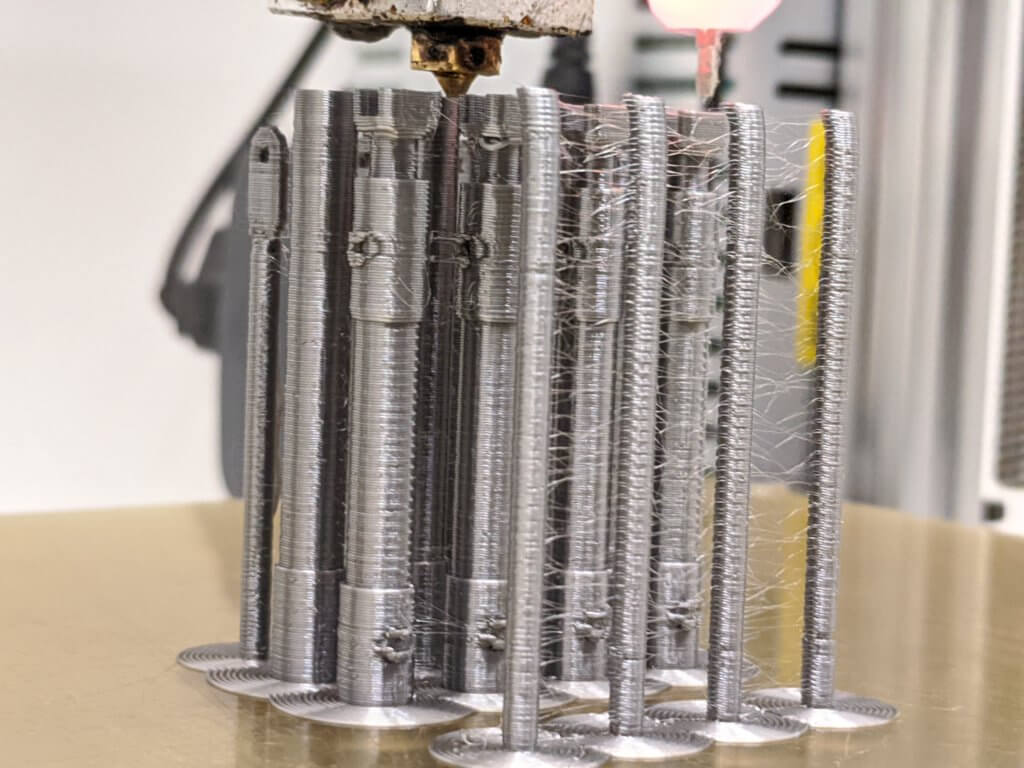
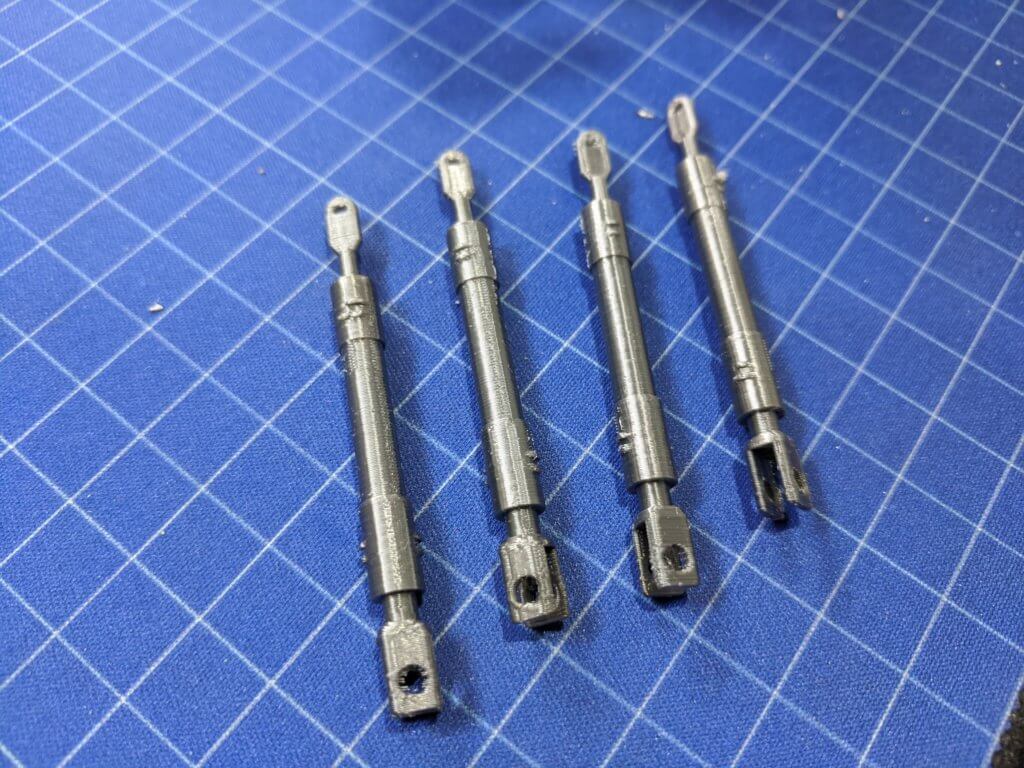
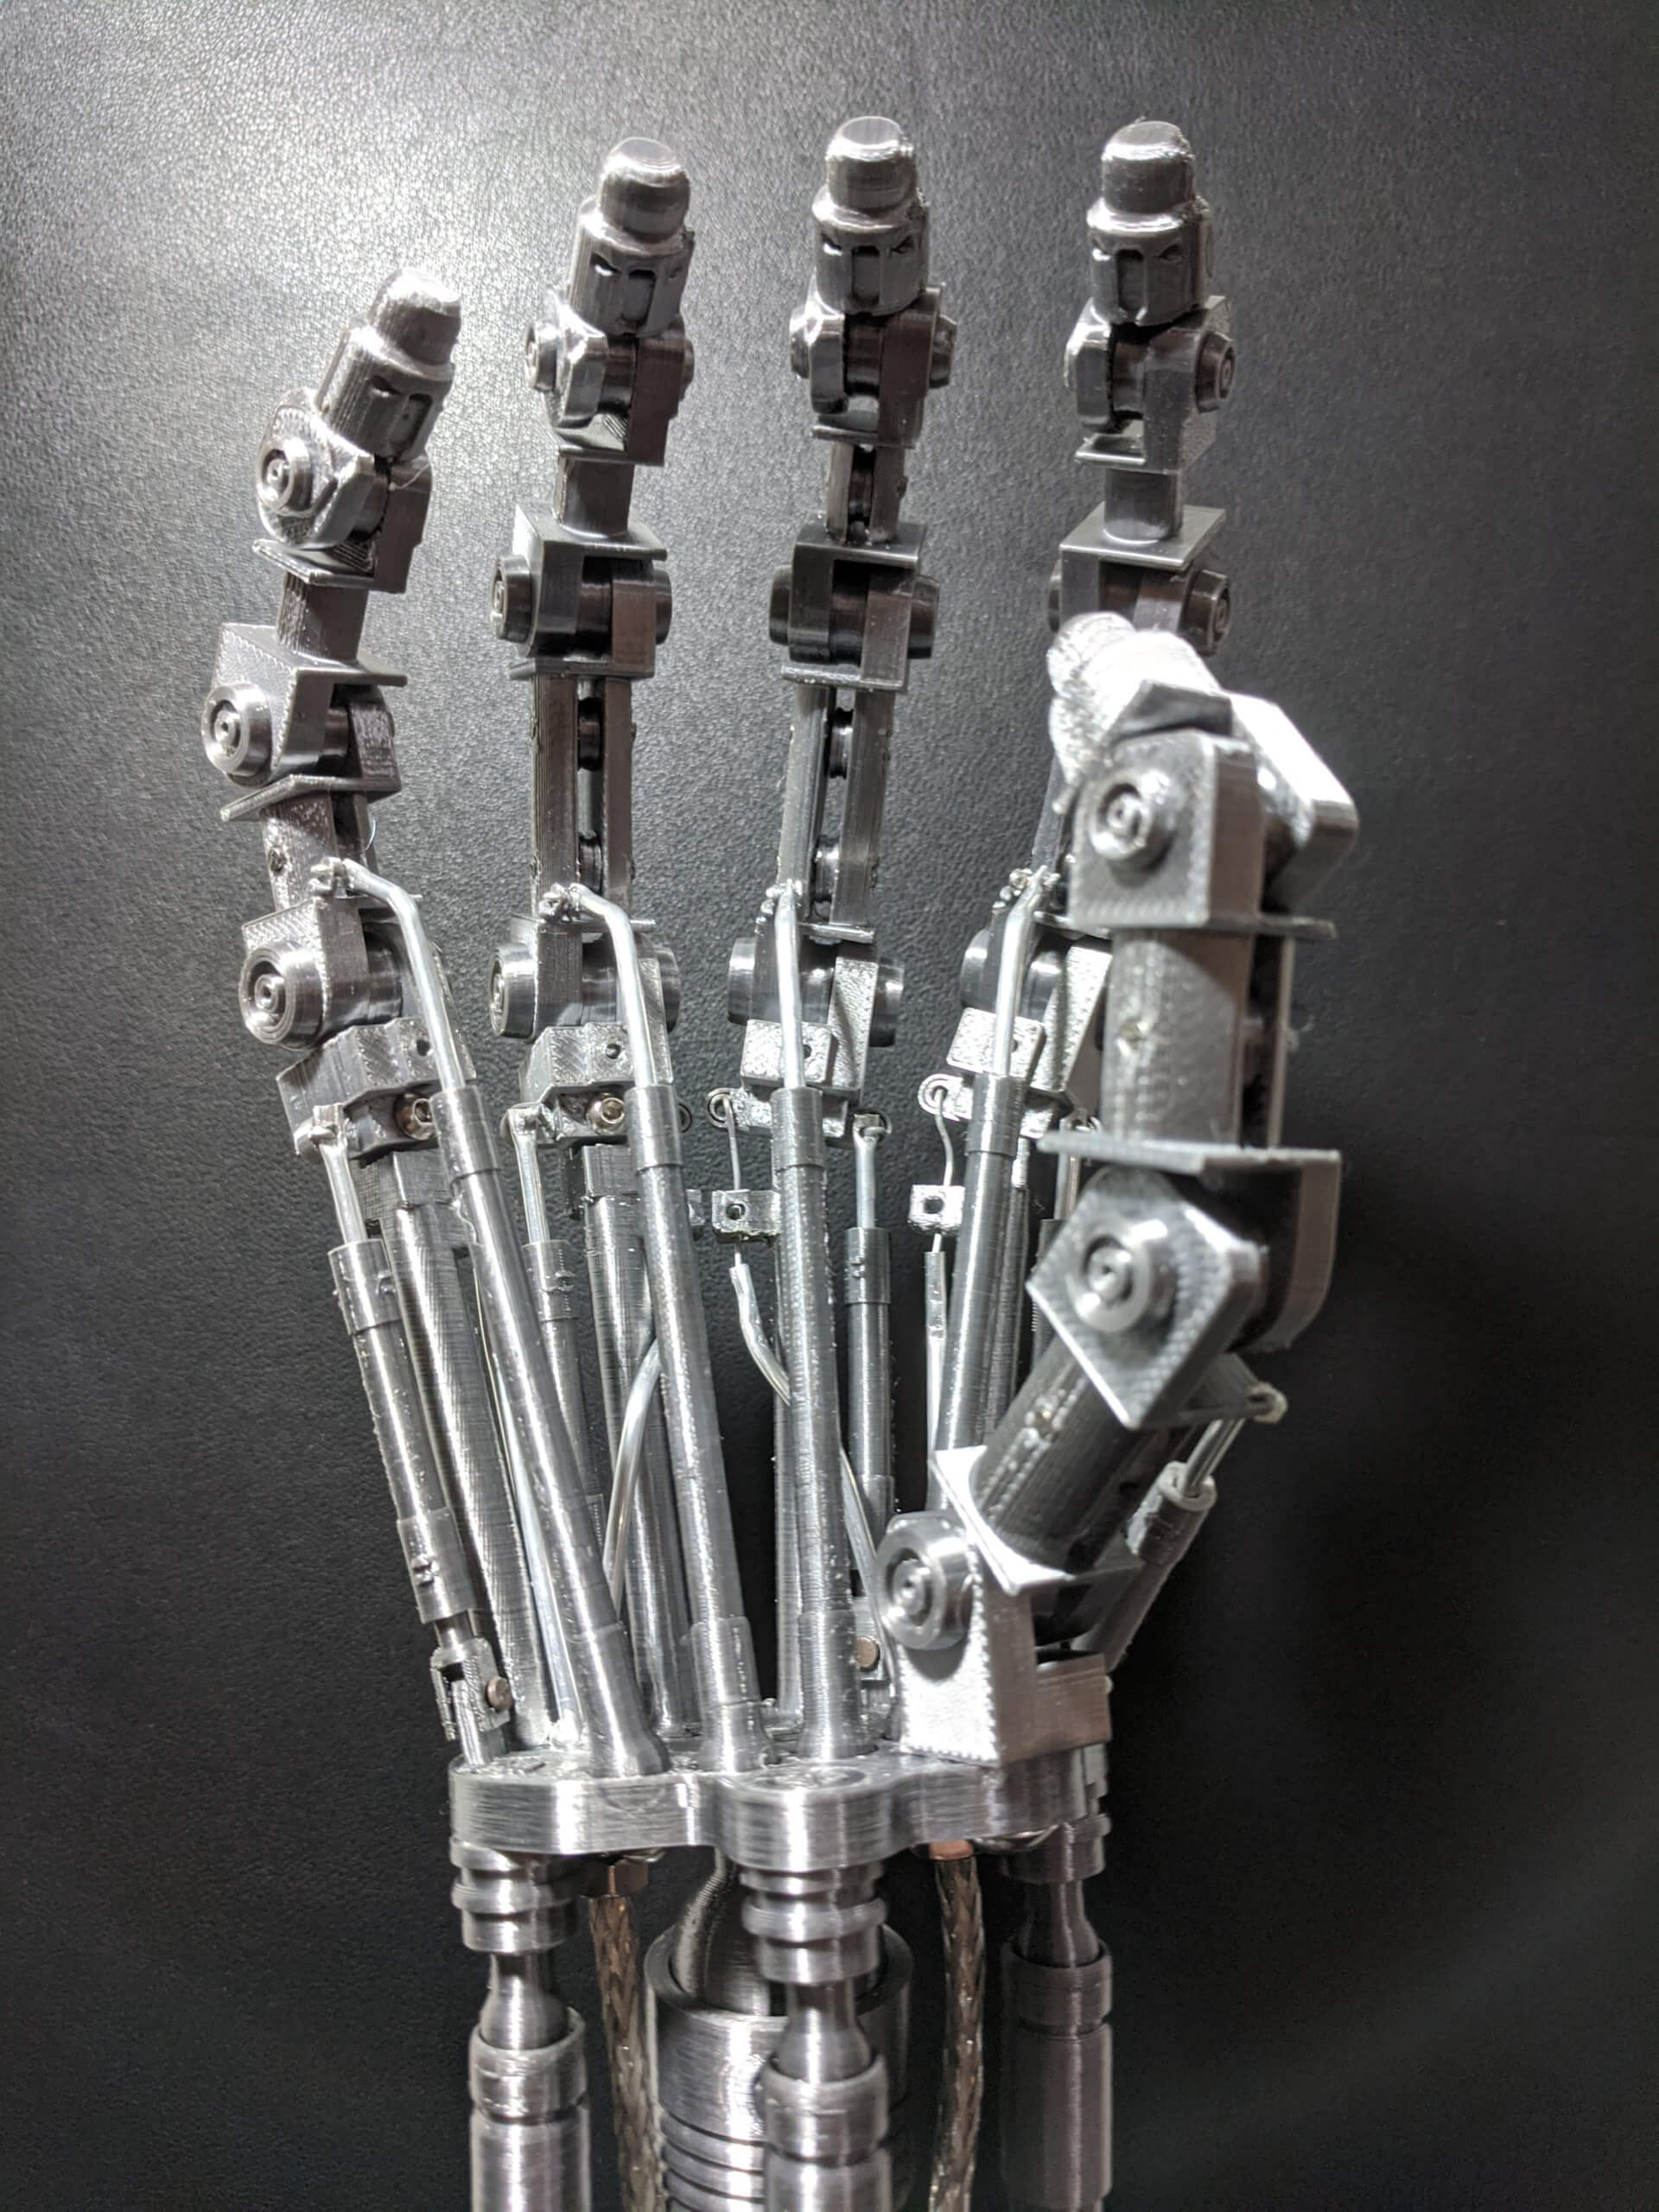
A couple aspects of this model that I knew were going to be an issue were the tall arm rods and the small hand tubes. The former because they were a few millimeters taller than my max print height, and the latter because thin tall objects have always been a pain to pull off with FDM printers. As far as the arm cylinders go, the tall pistons end up sliding into the large cylinders which provide enough slack to safely cut those extra few millimeters off the print. Getting them to look good though took a few tries. The first set I printed as is, but with tall skinny objects you often get a bit of sway as you get further up the print which causes a drifting in the layer alignment (as seen in the third picture below towards the ball sockets at the top). They came out okay, and would have been usable, but definitely could have been better. The second batch I tried slicing up into three separate lengths and then gluing them together afterwards with CA. These came out better than the first and would have been fine had I been planning to sand and paint to get rid of the seams. After looking at how the pistons fit into the cylinders though I realized that enough would be recessed that if I were to flip the model and print it with the ball joint facing down most of the variance caused by the wobble would be hidden down in the cylinder. This last batch came out great and is what I ended up going with.


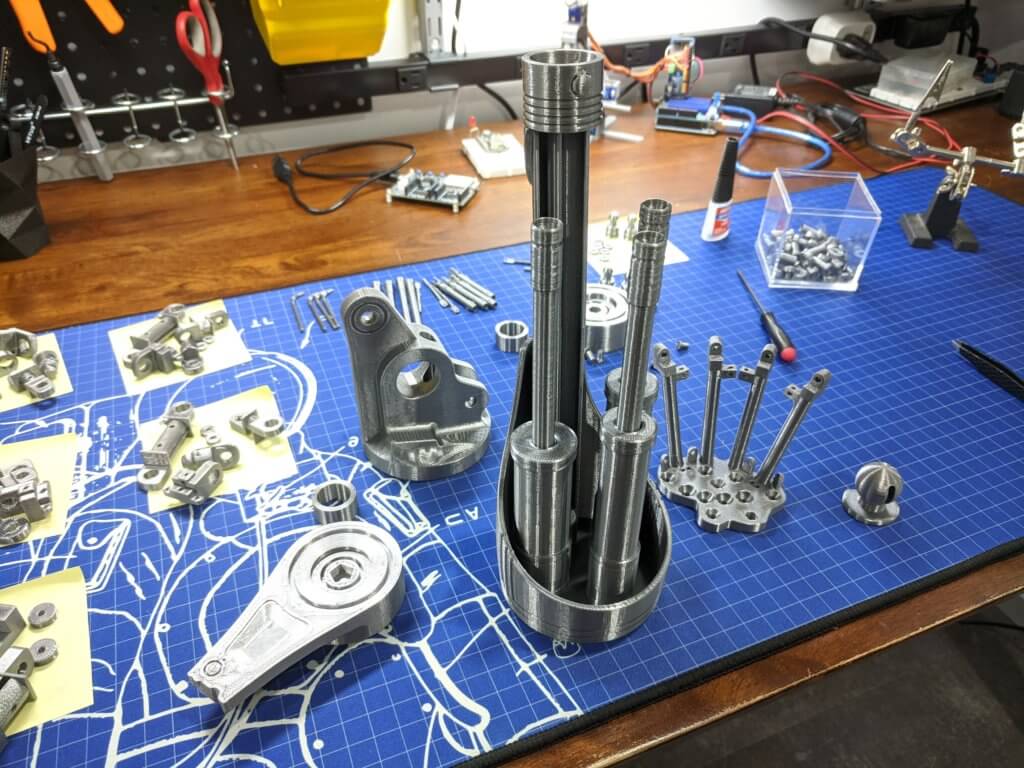
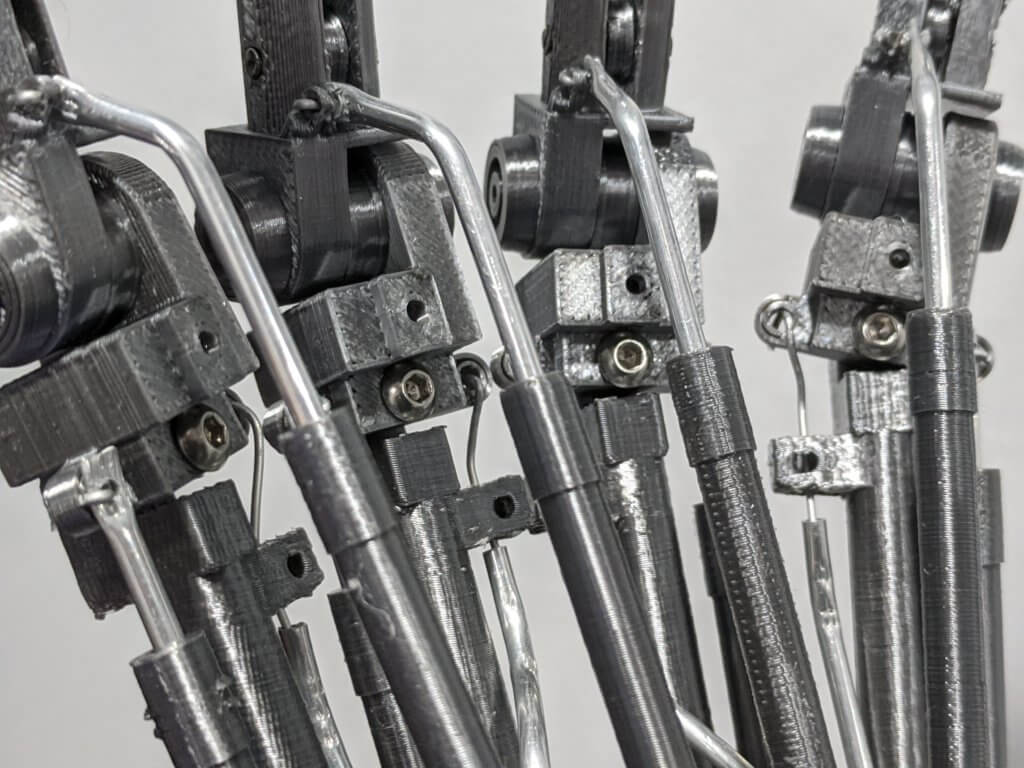
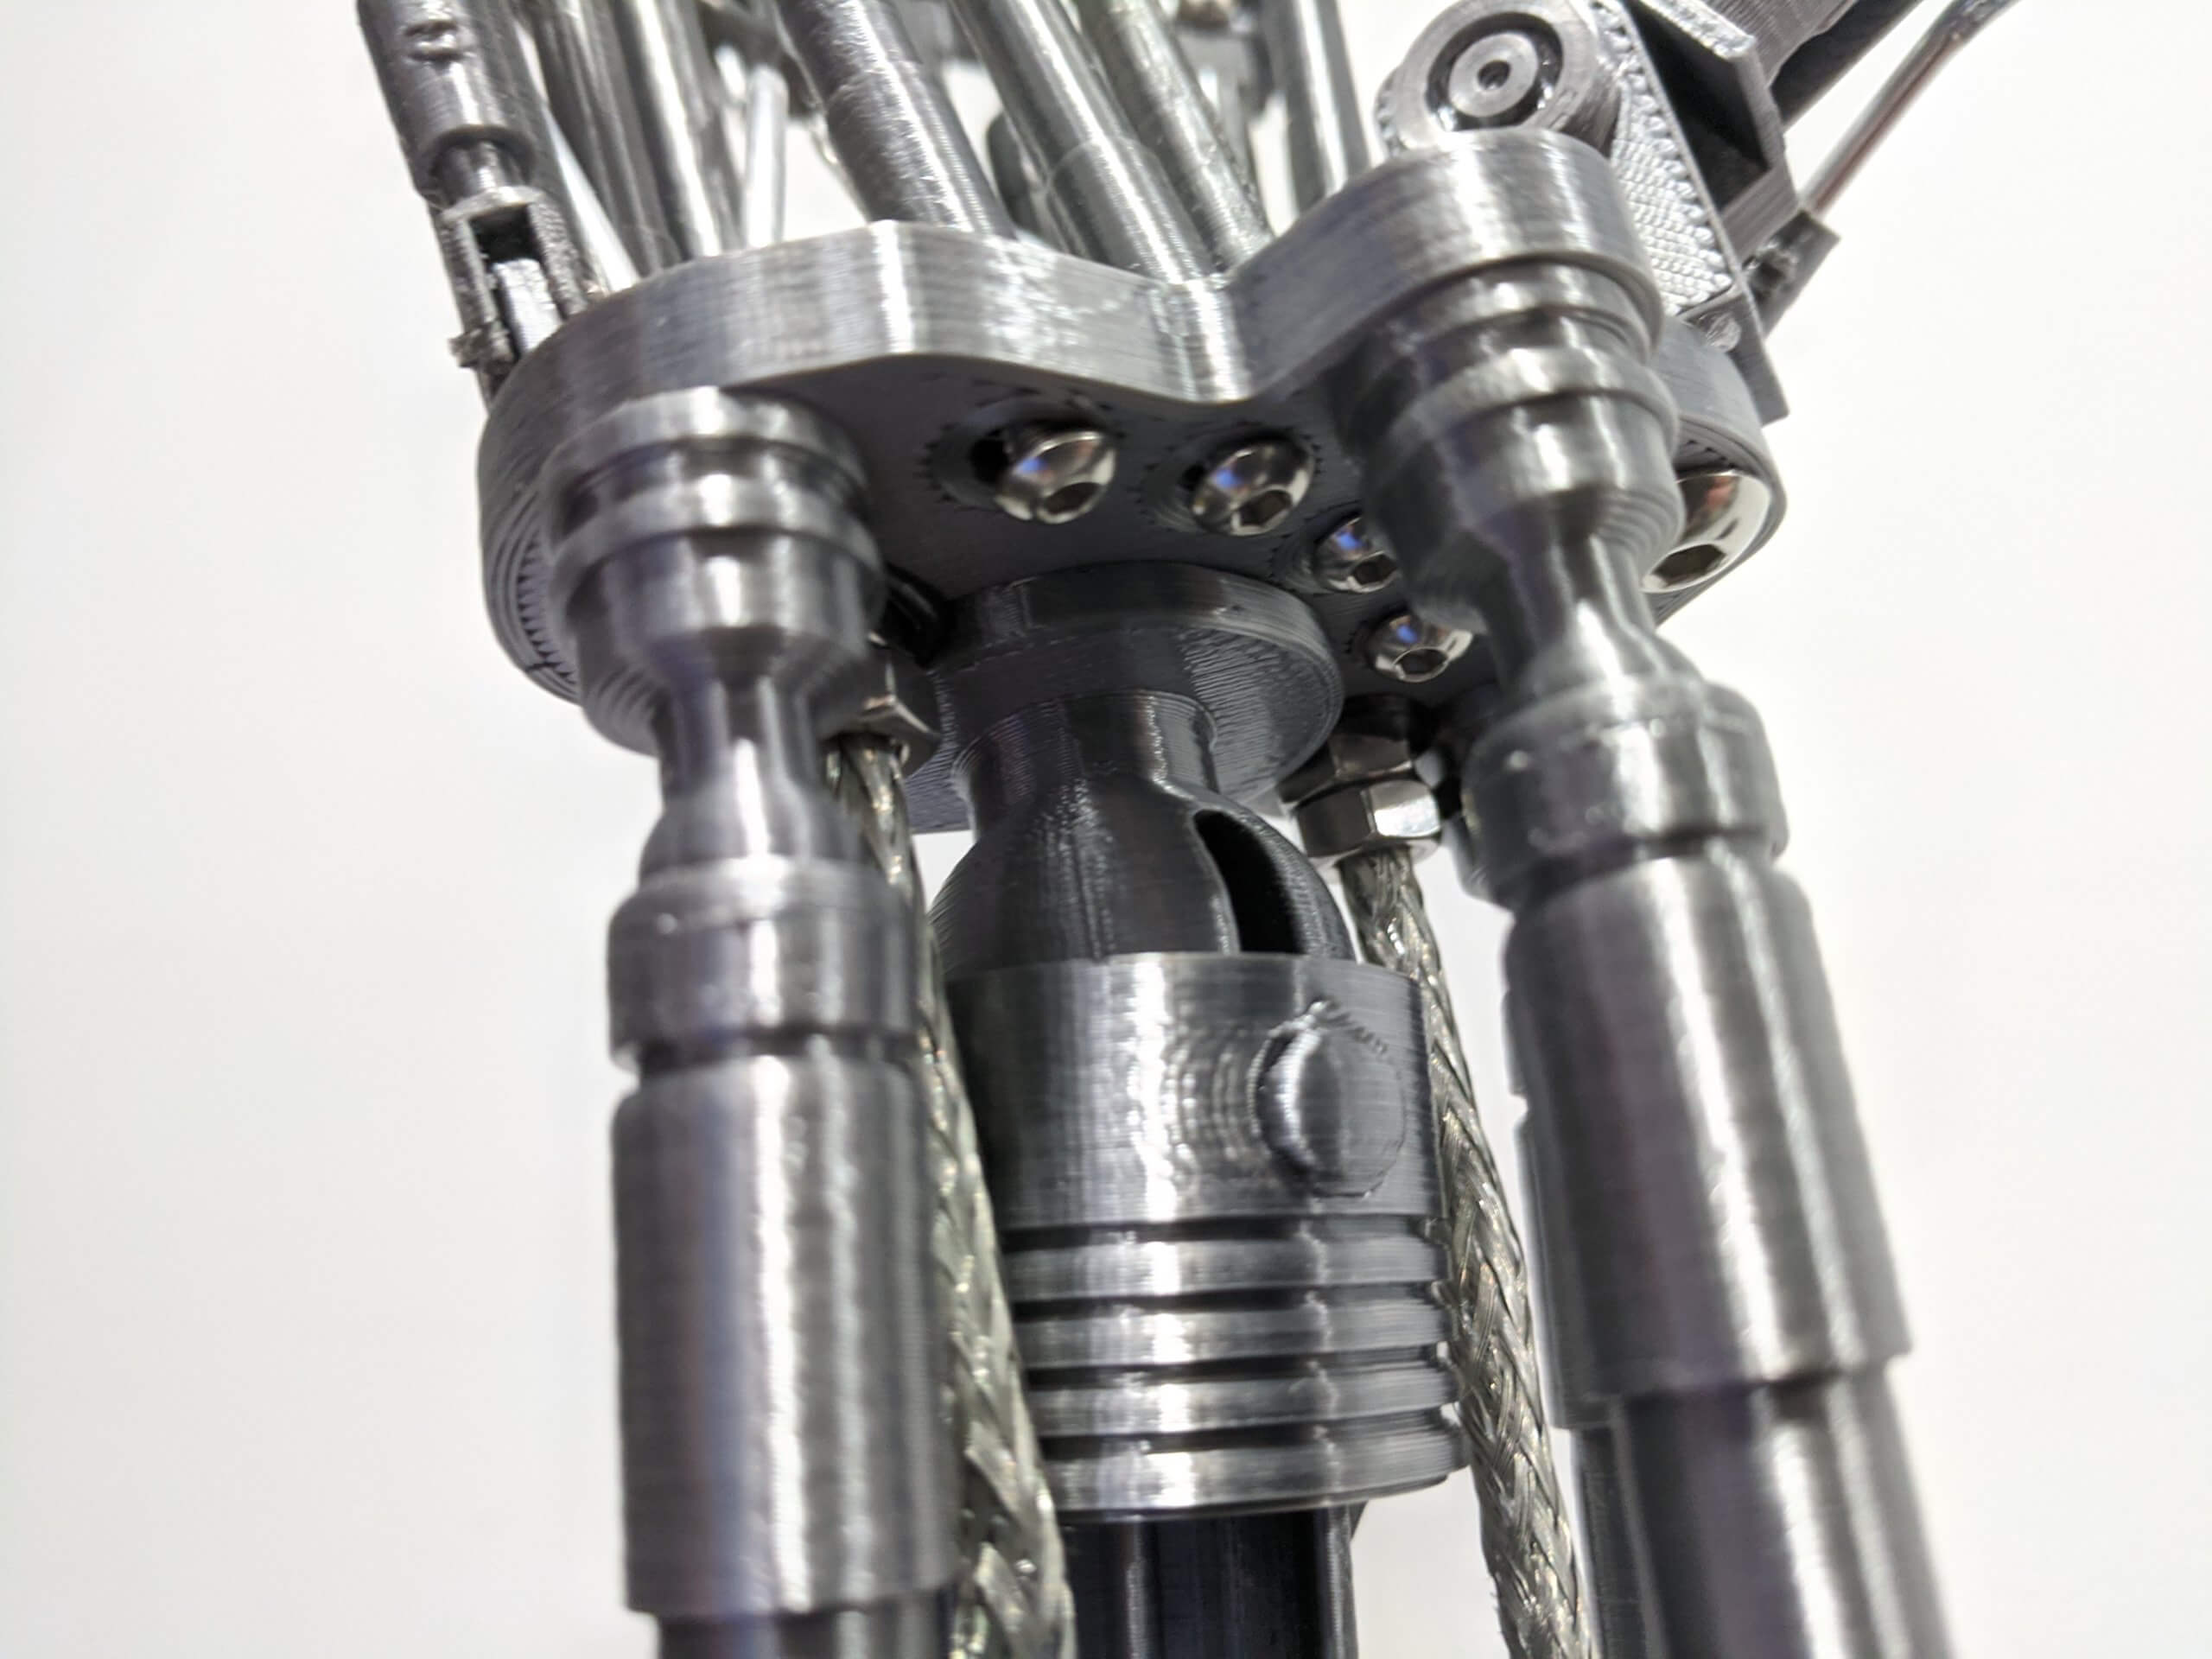
As far as the hand tubes go, I was able to get the cylinders to print okay, though given their size and thin walls were extremely fragile. The pistons for these though were quite difficult to print and so fragile that they’re probably not practical if you want the fingers to be able to move. After going through several sets of finger tube pistons I ended using some 3/32″ aluminum tubing and wire from the hardware store. This worked out great because not only was it strong for the size, it also helped strengthen the cylinders by supporting them internally.
For gluing parts together, while CA (cyanoacrylate, aka Super Glue) is typically the go-to for PLA and it did work on smaller parts, I did run into some issues with larger parts. In looking into a couple failed bonds it seemed as the silky finish of the filament might not have bonded as well as regular PLA usually would. For many of the larger parts and those involving metal I ended up using KwikWeld epoxy from JB Weld. It only takes six minutes to set up which proved to be just enough time to make sure parts were positioned correctly. Like the CA glue it also seemed to not want to bond well with the plastic but could be worked into the extrusion lines so that it grips the parts well enough to offer a strong mechanical bond after it cures. Just be sure to use enough and work it in inbetween the parts good.
The finger joints use a pair of printed pieces that press together to join the segments, however given the tolerances you really can’t depend on the press-fit alone. If you don’t want to move the fingers later and plan on affixing them from the get go this shouldn’t be an issue. If you do want to be able to move the fingers though I found placing a little blob of hot glue into the female joint segment before pressing them together can help to get enough tension to keep the fingers movable but not overly loose.
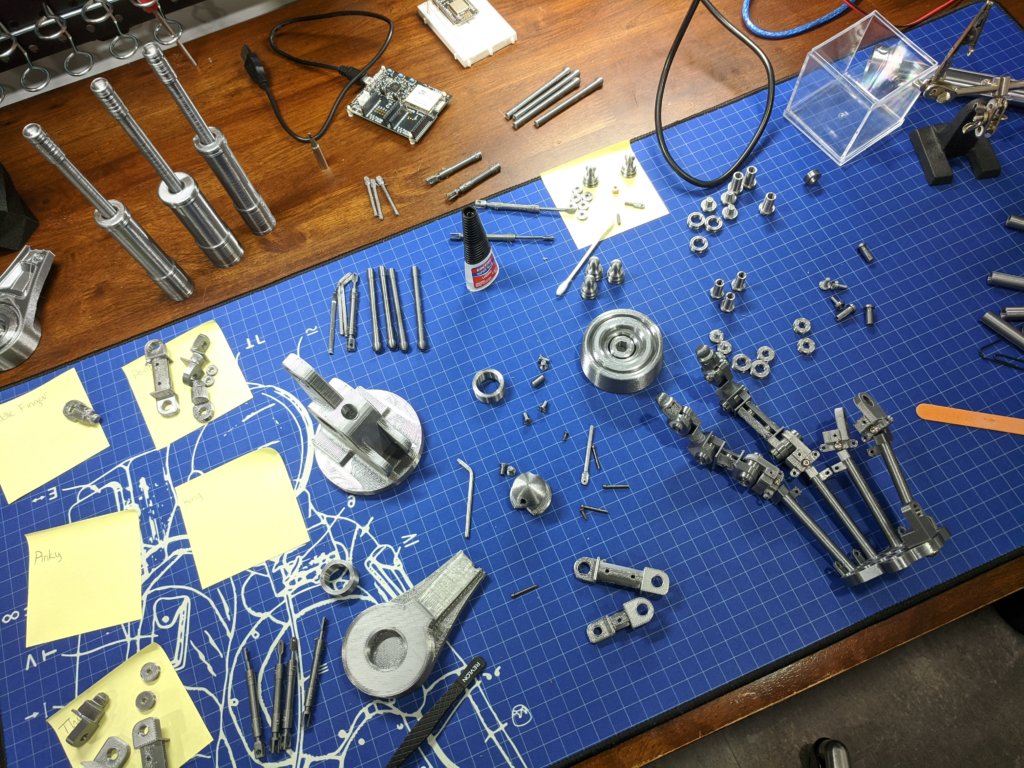
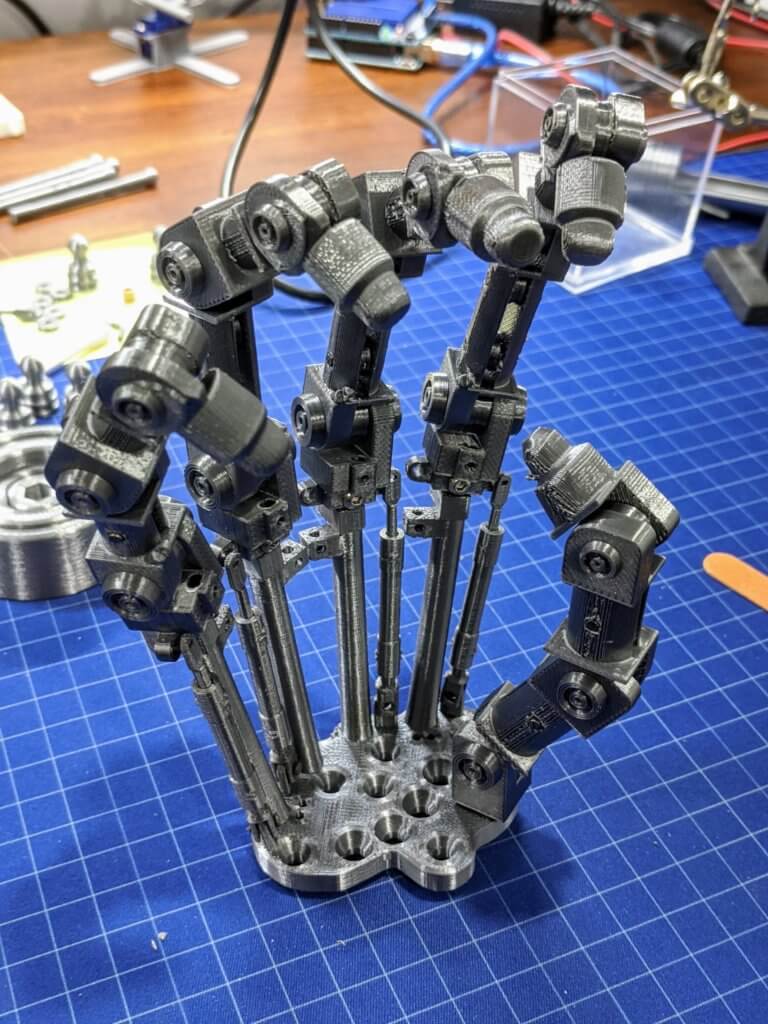

The hand tube cylinders were secured with bits of nails secured with CA glue. To secure the corresponding pistons to the fingers I just flattened out the end of the tubes a bit with a pair of needle nose pliers, punched a small divot into them with a nail, and then used a 1/16″ drill bit to make a small hole. A piece of aluminum wire could then be used to secure the piston in a way that allows it to move with the finger. To attach the longer hand tube cylinders with the ball-joint ball on the so that they could still move I just tapped them so that an M3 screw could be used to loosely secure them from underneath the hand plate. It is really easy to break the cylinders while tapping though so I ended up going through a few sets. Making sure you have good layer adhesion and plenty off walls really helps.
For finishing touches, after looking through stills from the Terminator movies I took a spare hand tube cylinder and shortened it a bit to use on the outside of the thumb. It looked like there was also a tube running to the thumb in the movies, but I ended up skipping that detail. I added a few bent aluminum tubes and wires to the opposite side of the fingers and stripped an old USB cable down to the shielding to use as cables in the forearm which were attached with a couple M5 nuts and some epoxy.
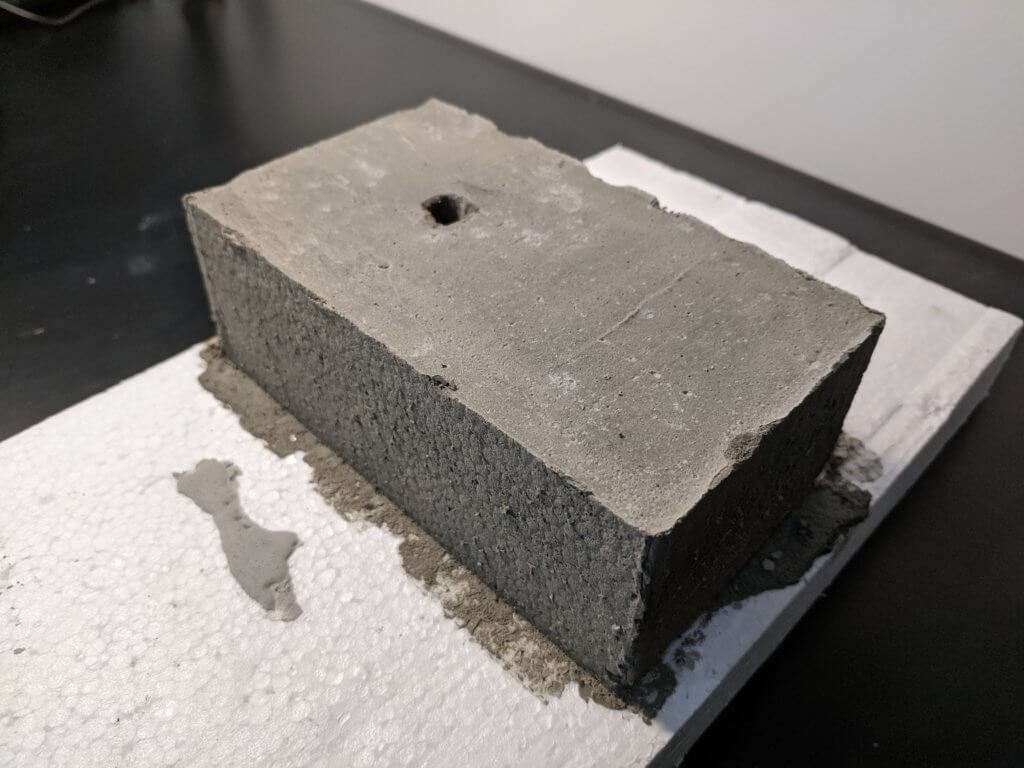
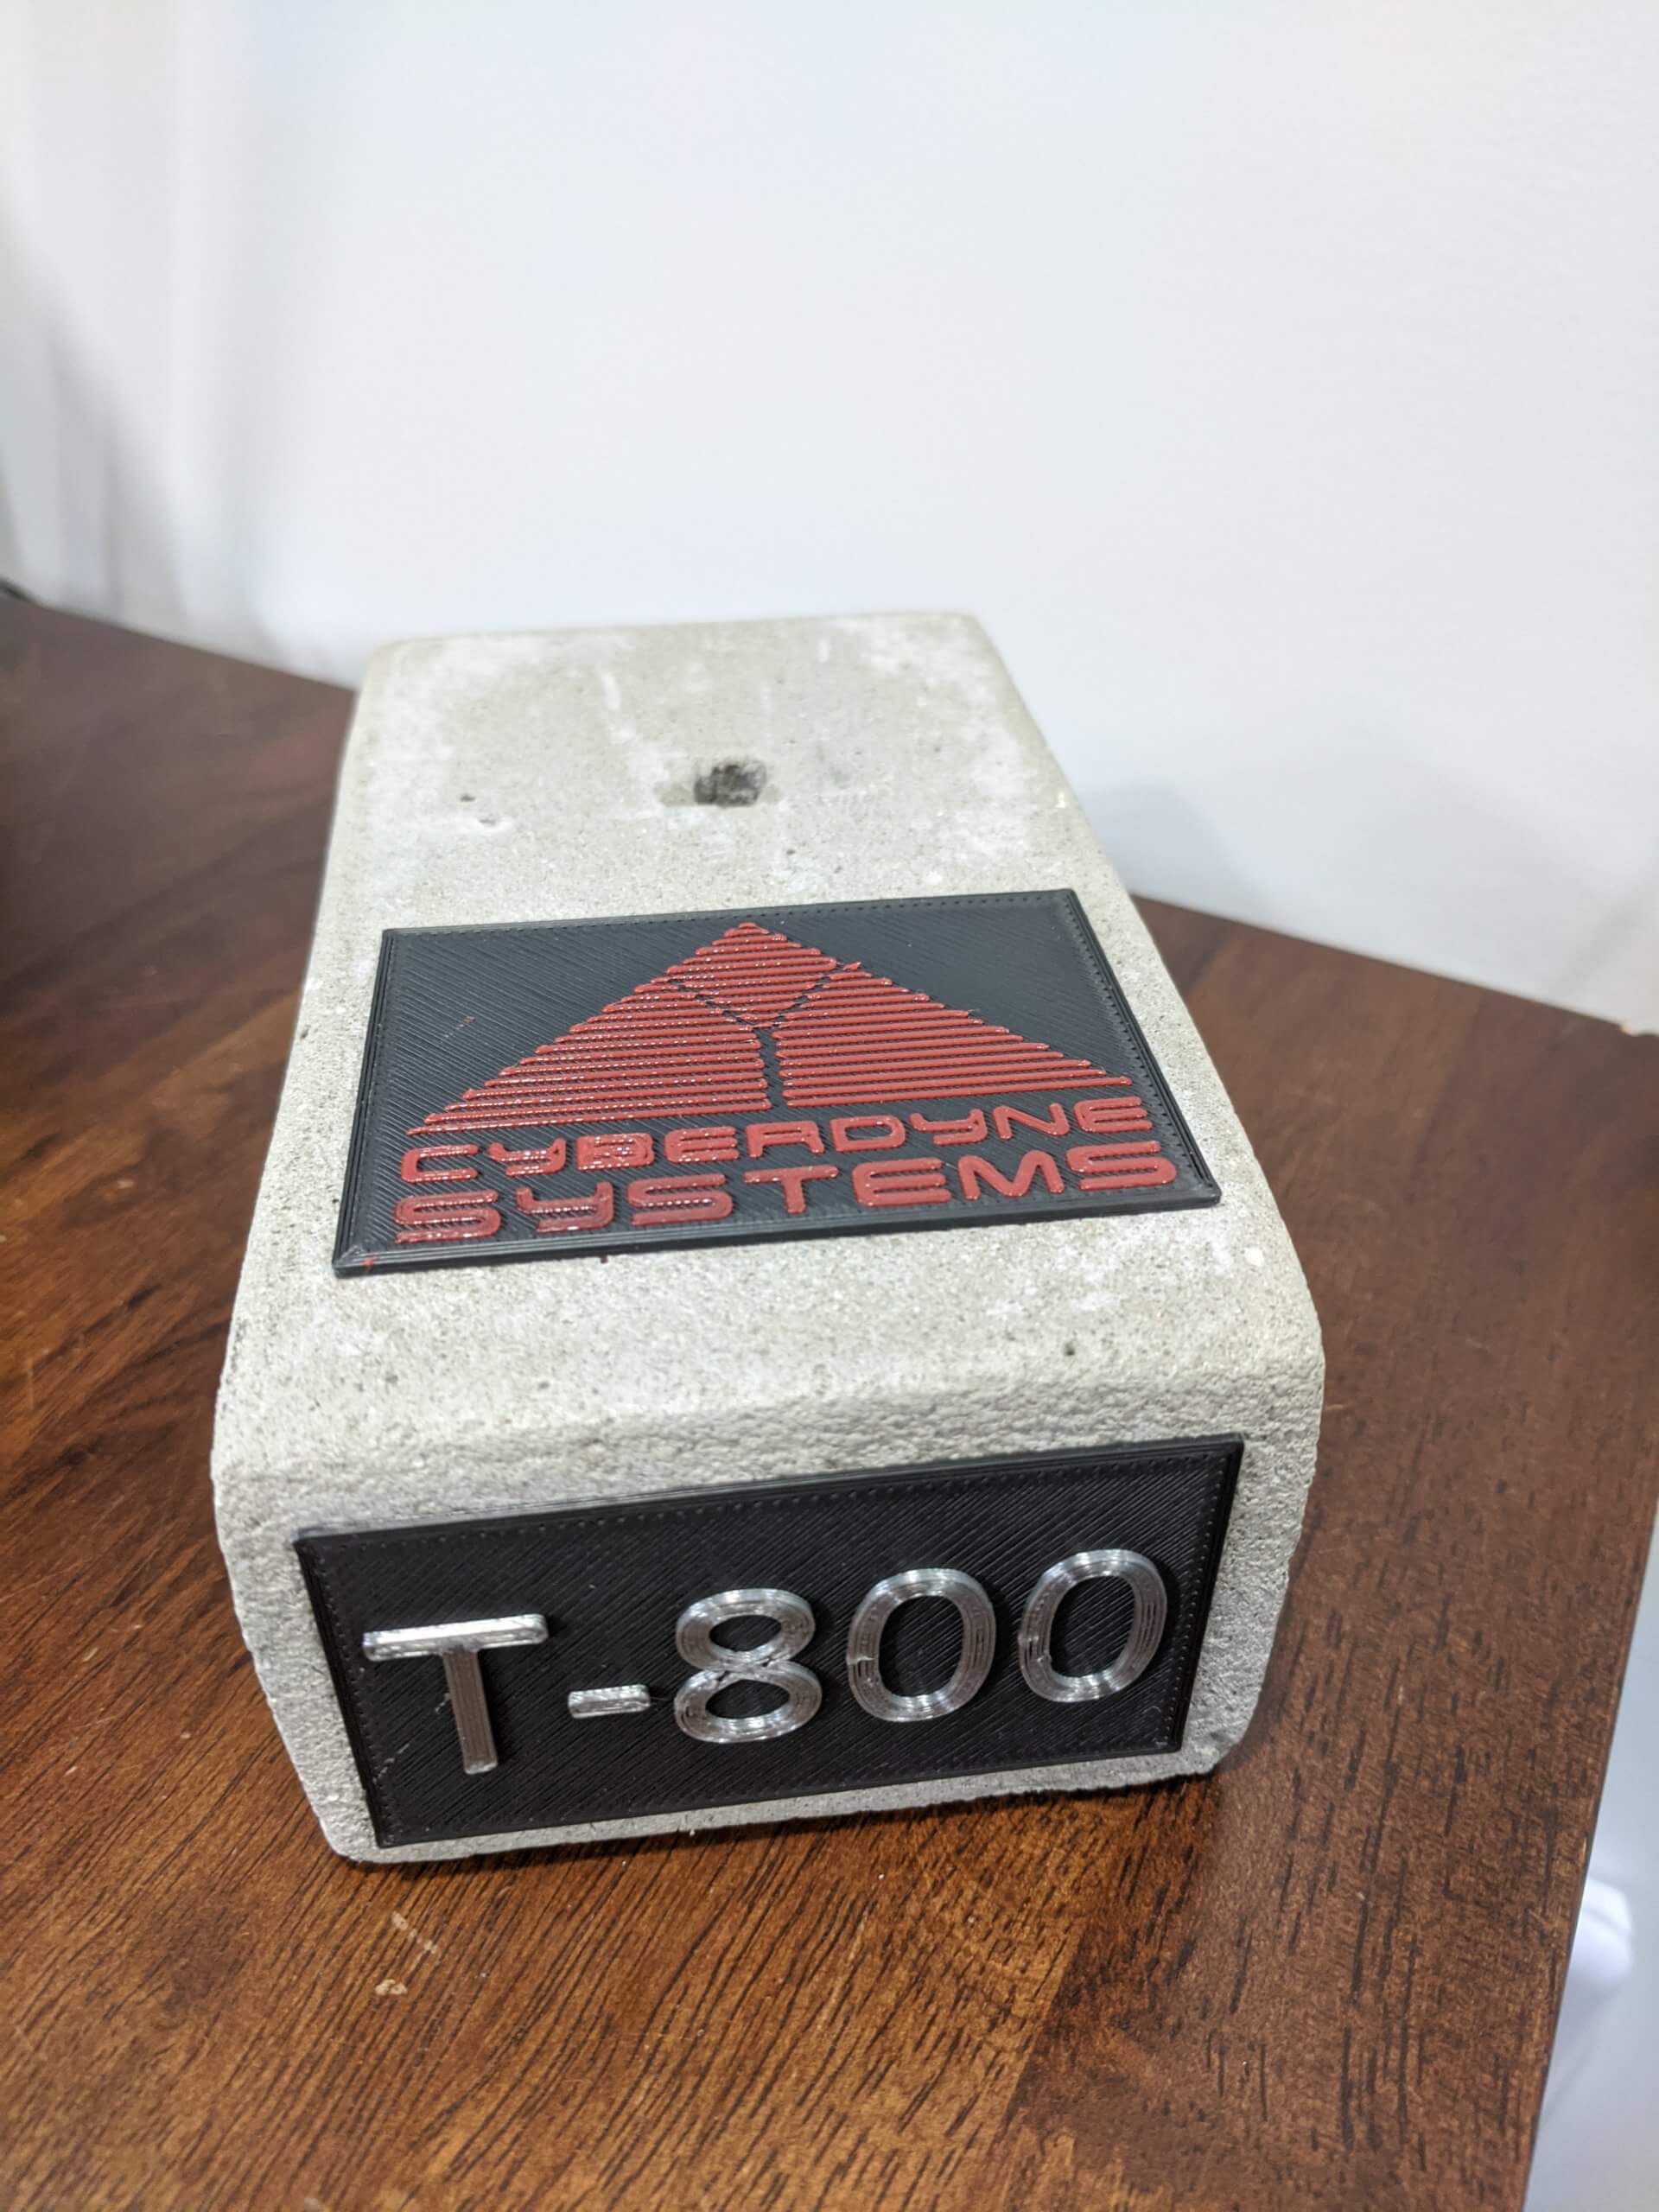
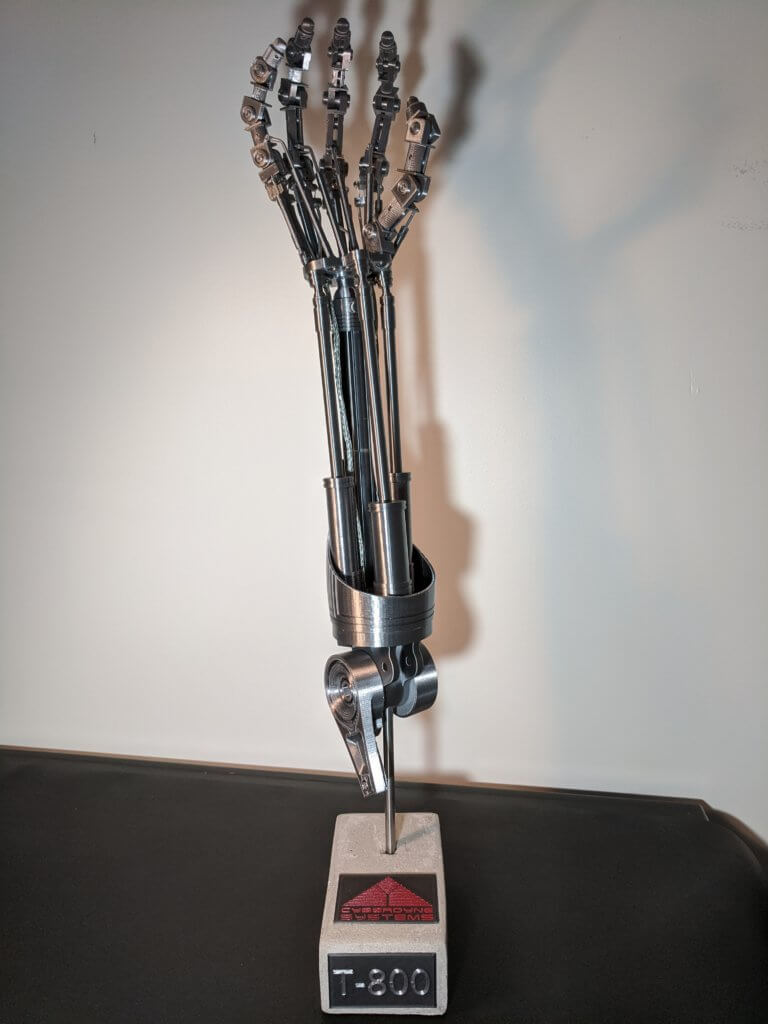
The original model on Thingiverse was designed as a lamp with an accompanying base that could use an inverted glass vase as a cover in homage to the movie. Not wanting to run up to Ikea so close to the holidays, I decided to see what could be improvised with objects from around the house. I ended up using some extra concrete mix I had and a mold made with spare styrofoam held together with toothpicks. I used a 50/50 mix of water and acrylic fortifier and used the hammer-drill mode on my cordless drive to vibrate the mold against a piece of wood to remove air bubbles. A spare length of 3/8″ rod was used to make the hole for arm’s mounting rod. After letting it cure for a couple days I sanded it down a bit to remove the styrofoam texture and hit it with just a really light coat of gloss lacquer to give it a bit of a finished look, but not enough to actually make it look wet or glossy. After the lacquer dried I attached some rubber feet and printed a couple plaques that were epoxied onto the base.


I’m missing left hand at wrist, always wanted a terminator like hand even if I had to just move the fingers
It’d be nice to hold a soda can or fish pole